A Holiday Crackers Challenge!

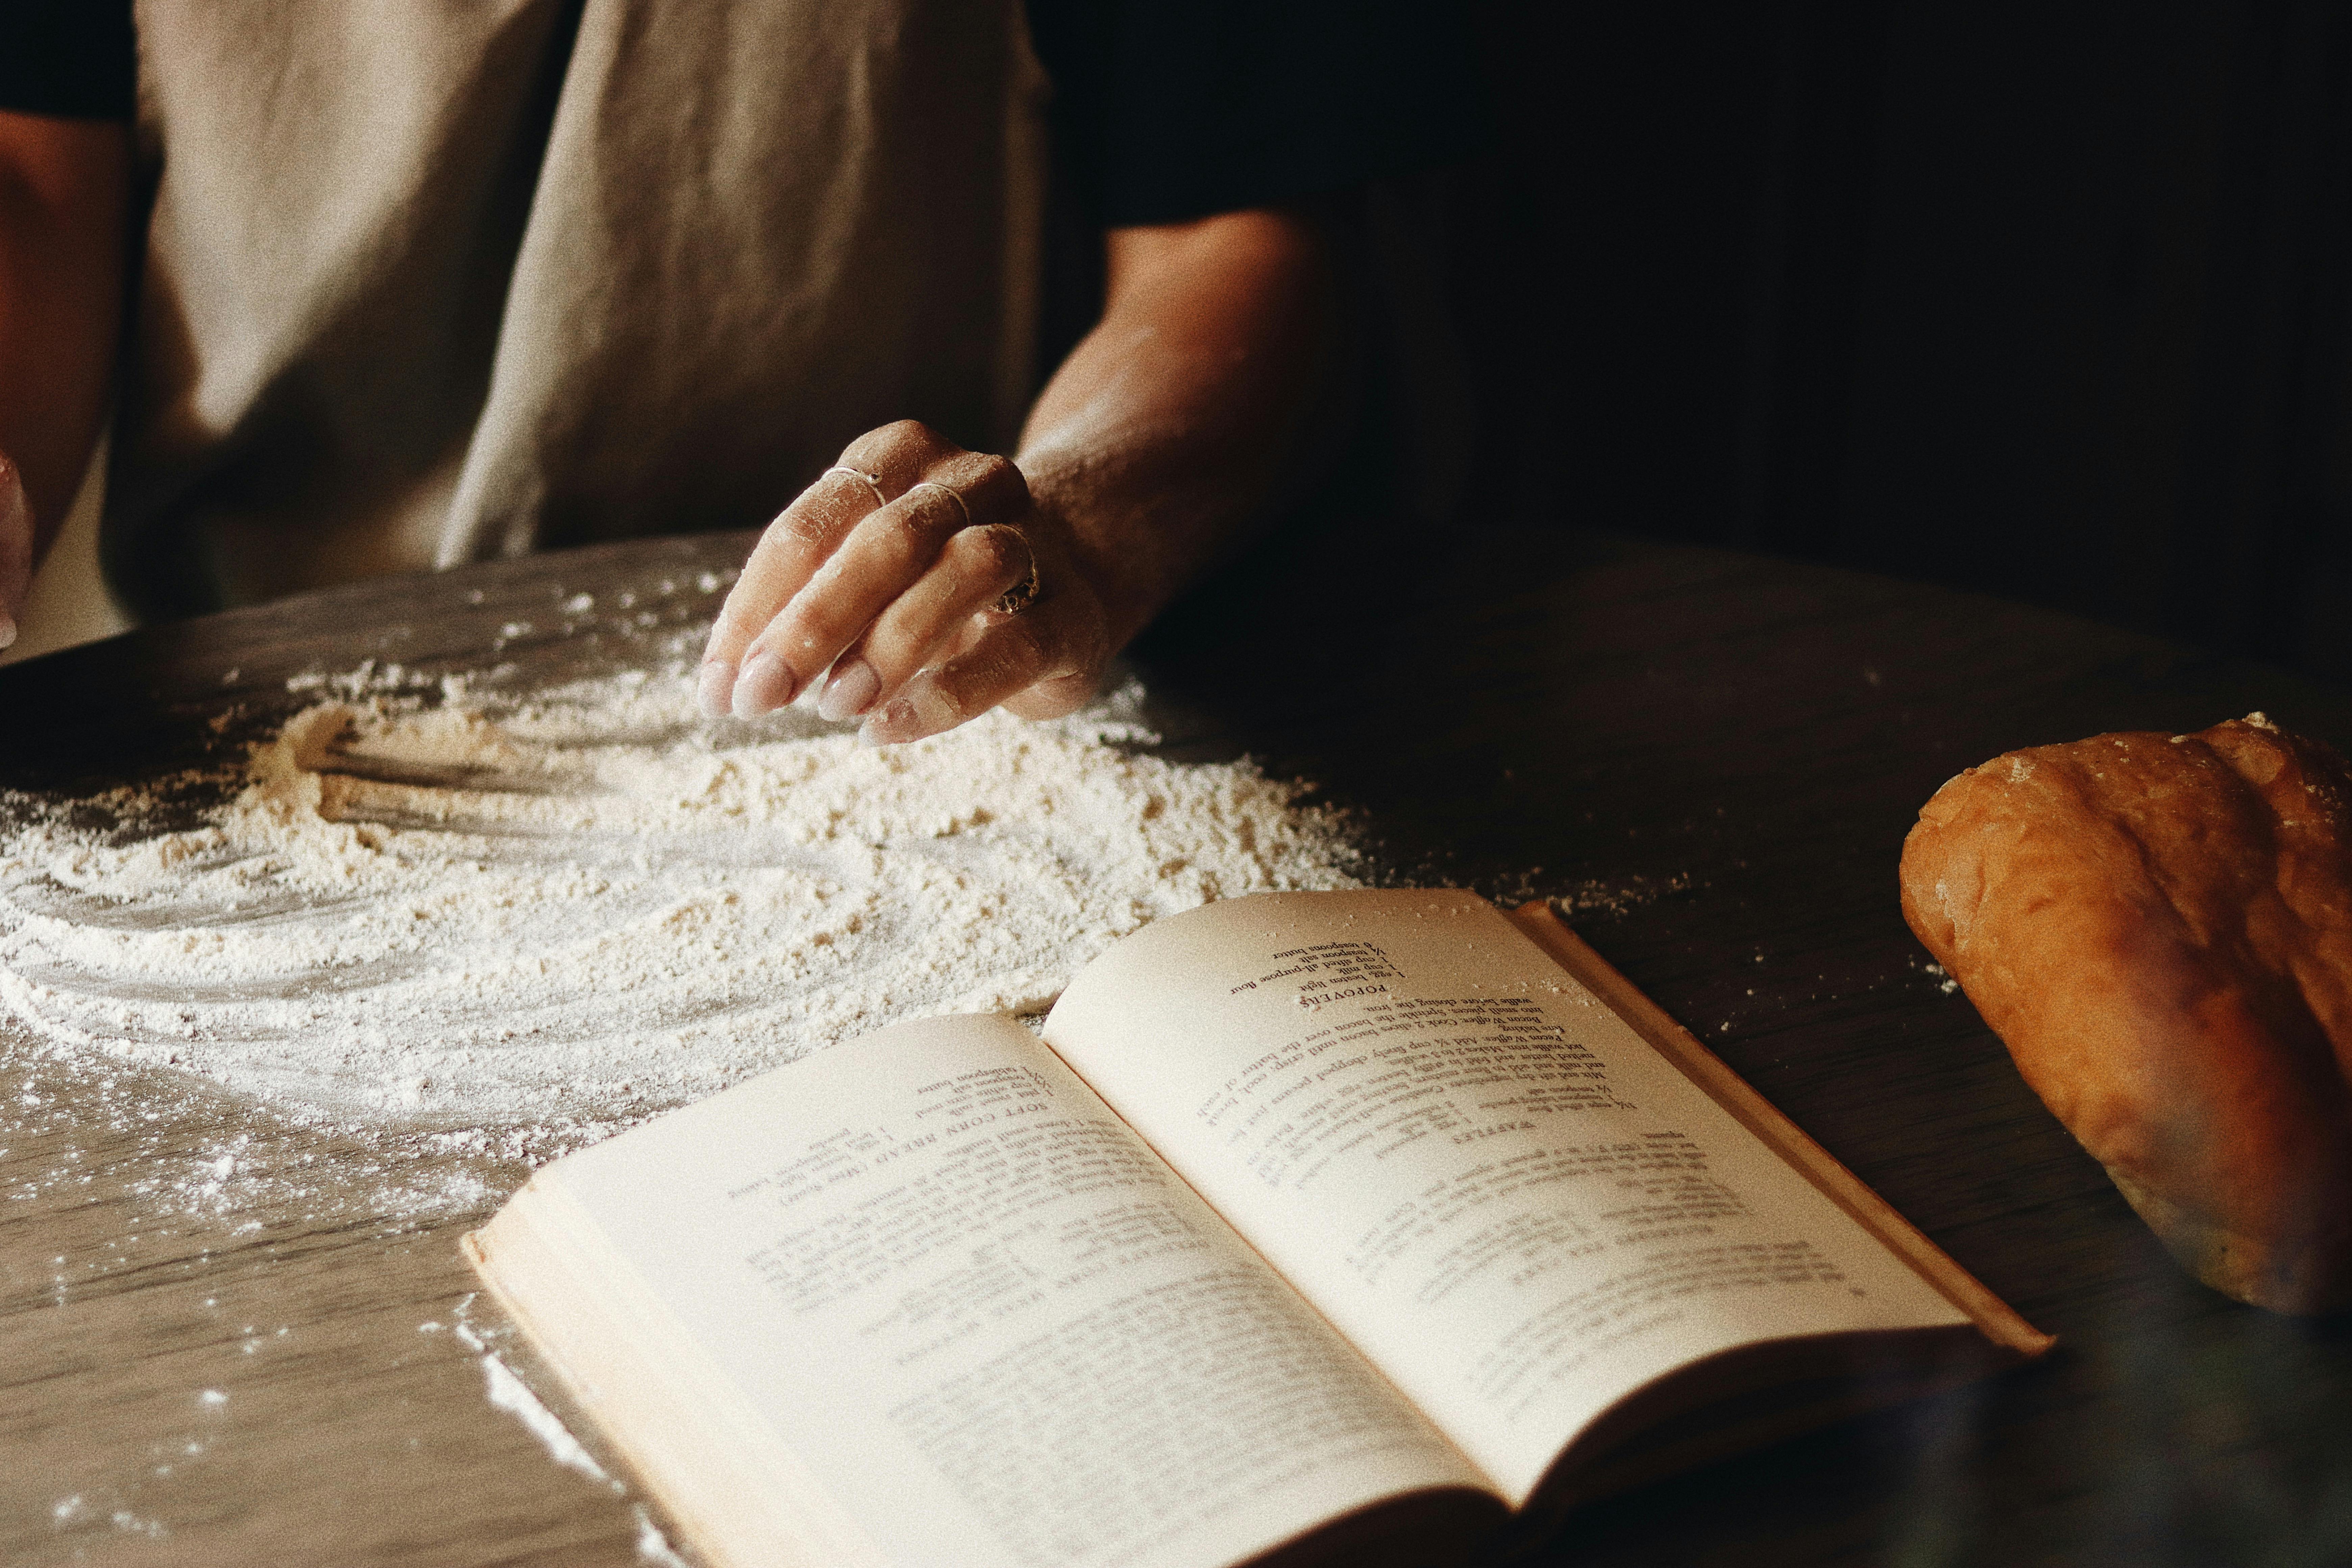
Have you noticed that a box of crackers is costing a whole lot more these days than it used to?–especially if you’re wanting specialized grains or herbed flavors? Why not “save” and make my own? Right! I’ve had a hankering for cracker flavors you just can’t find at the grocery, a lust for crackers made with our super-nutritious Southwest flours and herbs. So…fortified with locally-sourced materials, I searched cracker recipes to guide me, but I batted almost zero–so few recipes are out there. I took this dearth as a challenge. Tia Marta here to share some of my cracker experiments–and to challenge YOU to invent your own holiday crackers!

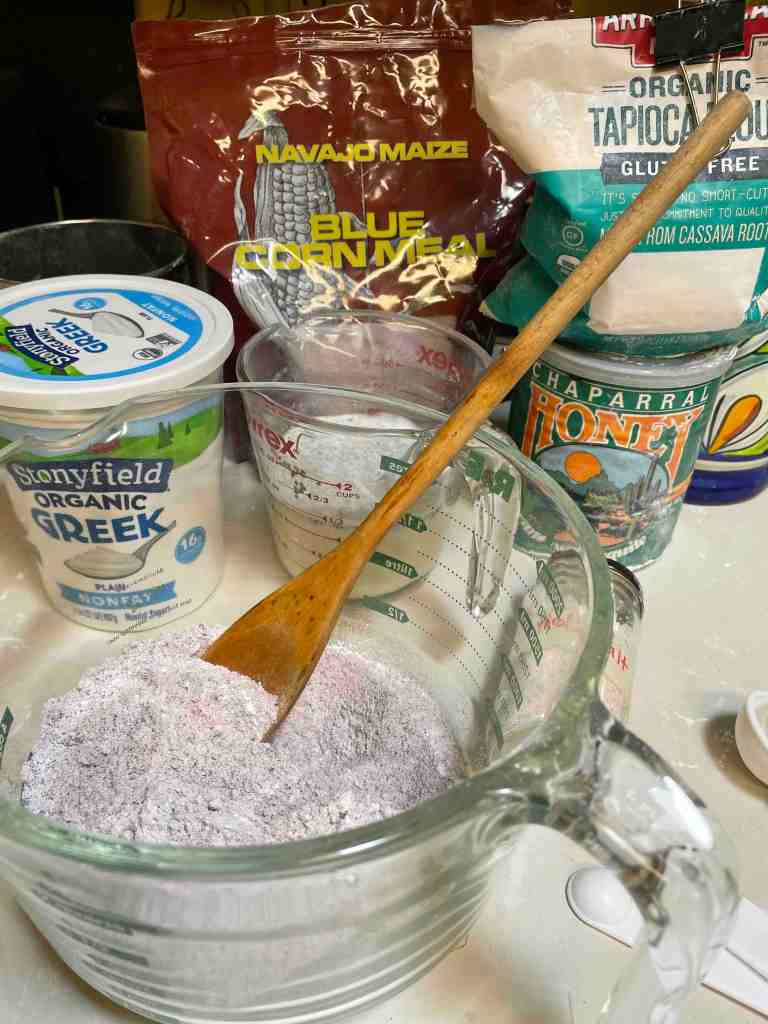
This is fun new territory. First with the goal of a gluten-free Southwest cracker, I took on Native blue cornmeal as the major delicious ingredient, with tapioca flour and chia seed as “binders”.

Recipe for Gluten-free BlueCorn-Amaranth-Chia Crackers:

Ingredients:

3/4 Cup blue corn meal (available from NativeSeedsSEARCH)

3/4 Cup tapioca flour

1/2 Cup amaranth flour 

1/2 tsp baking soda

1/2 tsp sea salt (I used salt from Baja California)

2 Tbsp non-fat plain yogurt (Greek yogurt can be a no-fat substitute for butter)

3/4 Cup lowfat buttermilk

1 Tbsp. chia seed

1 Tbsp mesquite honey (optional, amaranth flour can be a little bitter) (or a generous glob of honey on a teaspoon)

You’ll need a greased pizza pan and a greased rolling pin.

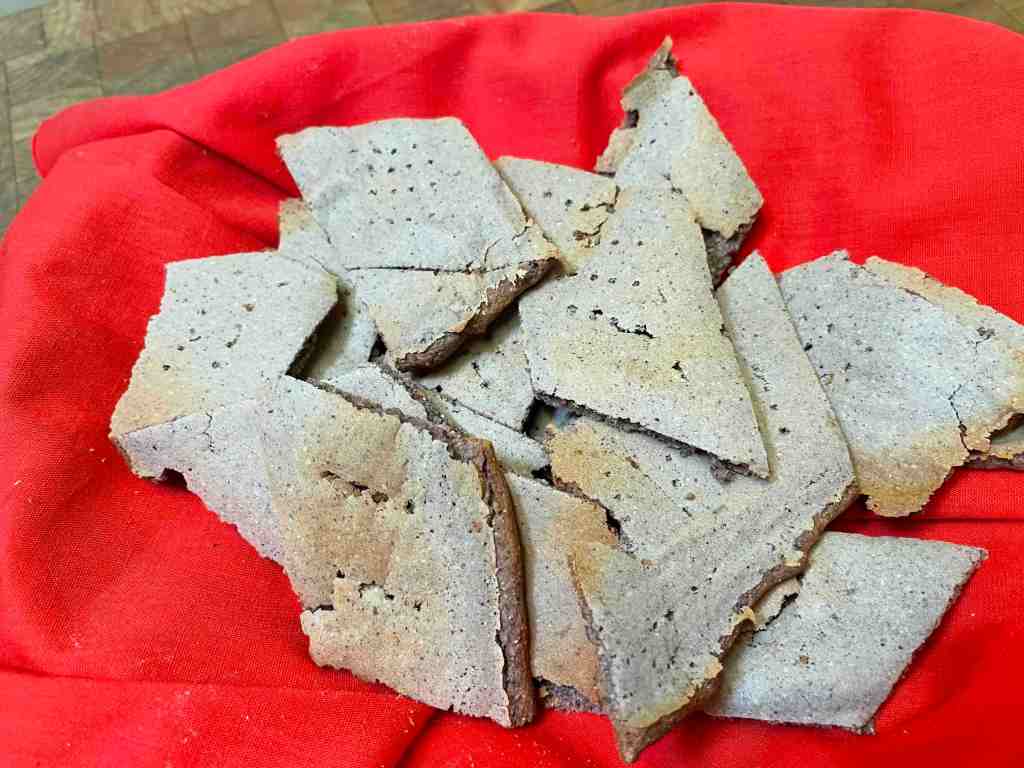
Place half the dough in center of a greased pizza pan. With your fingers press the dough down and outward. Your goal is to create a thin 1/8″ layer of dough on the pan. Using a greased rolling pin, flatten the dough out from the center. Use fingers to push the the thinnest edges back to a uniform thickness, or edges will scorch in the baking. Carefully cut the thinned dough with a sharp knife into squares, and make holes with a fork to even the heat. Bake 8-10 minutes or until you see a toastiness. With a metal spatula, lift the hot crackers off the pan right away to cool.

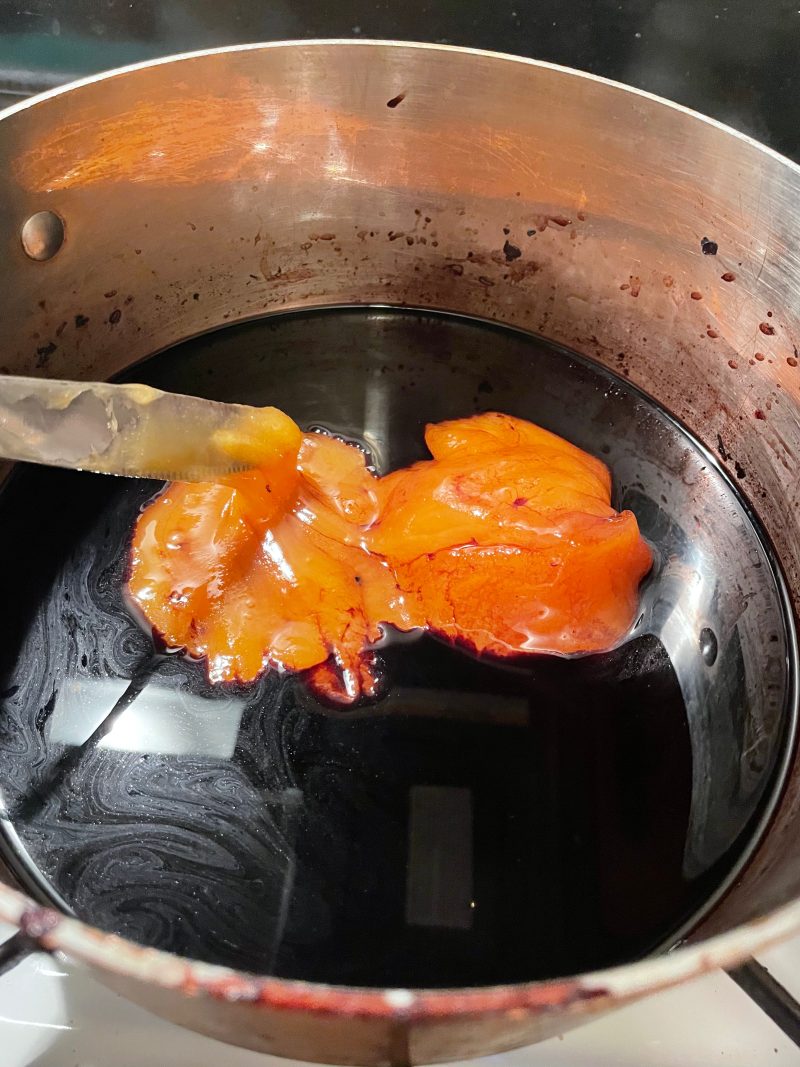
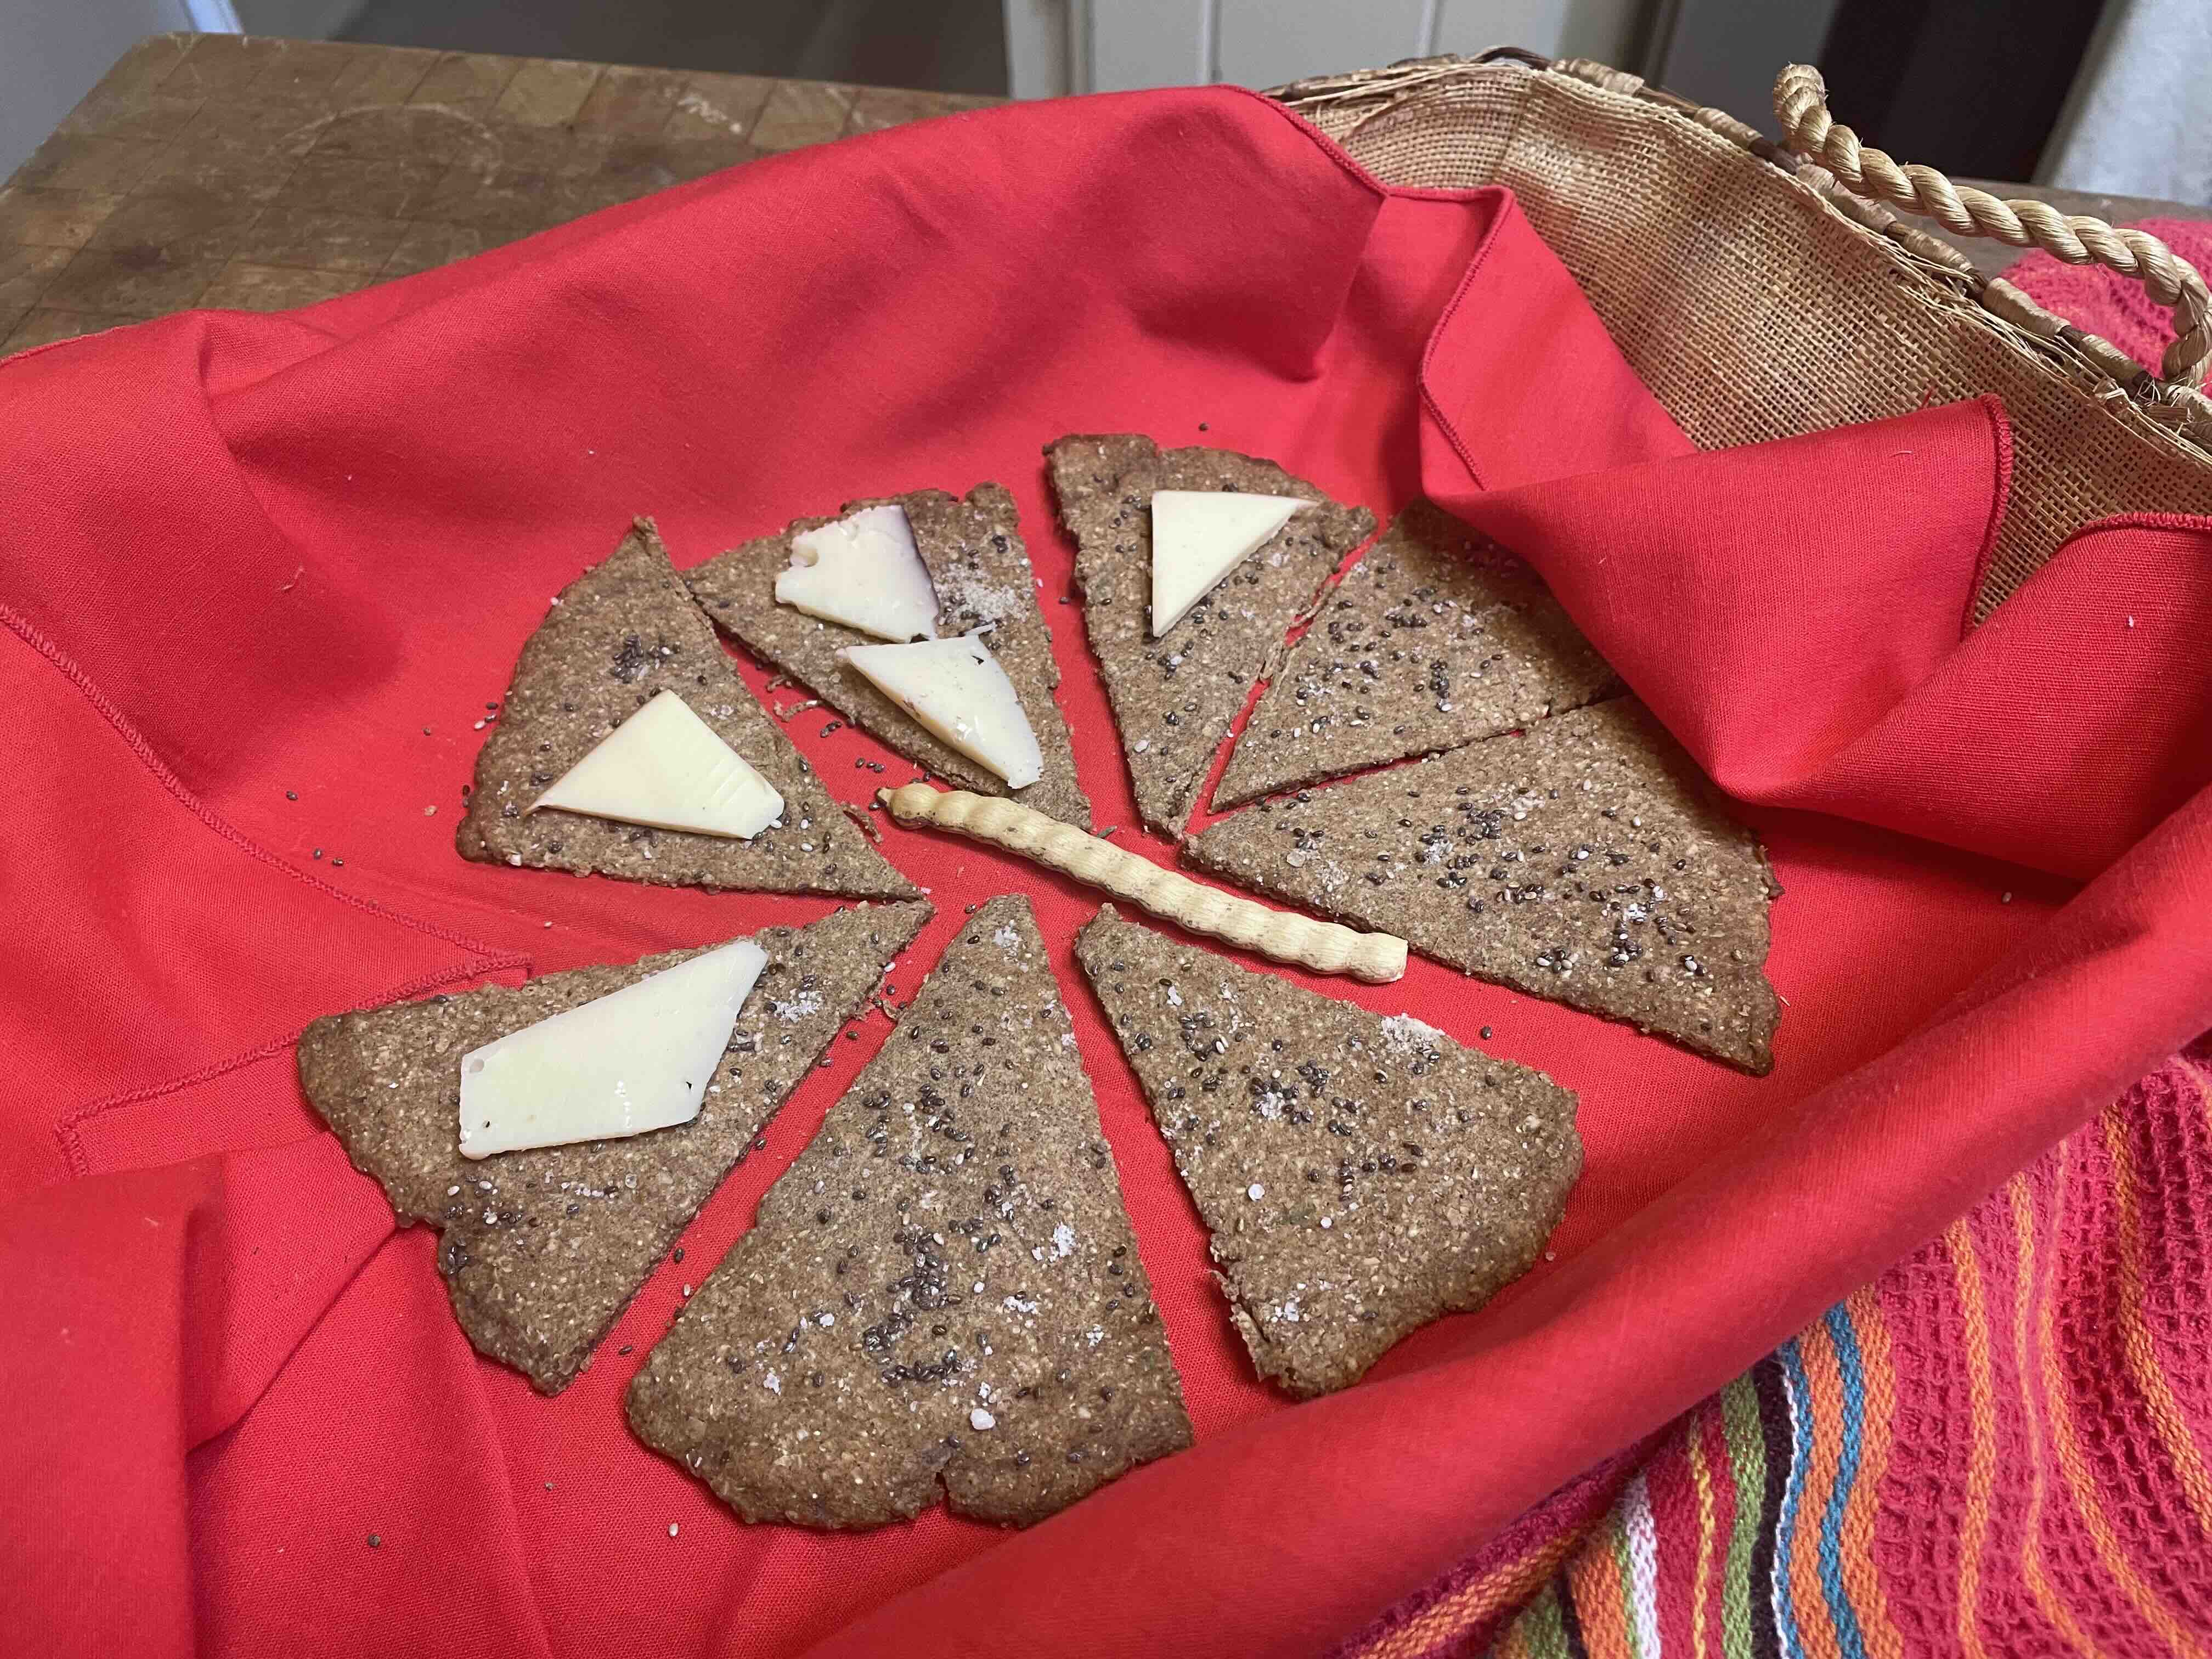
Enjoy nutritious gluten-free BlueCorn-Amaranth crackers with thin slices of membrillo, or with a creamy cheese–a new taste treat with a hint of sweetness.

You’ll see more pictures of the cracker dough prep-process below.

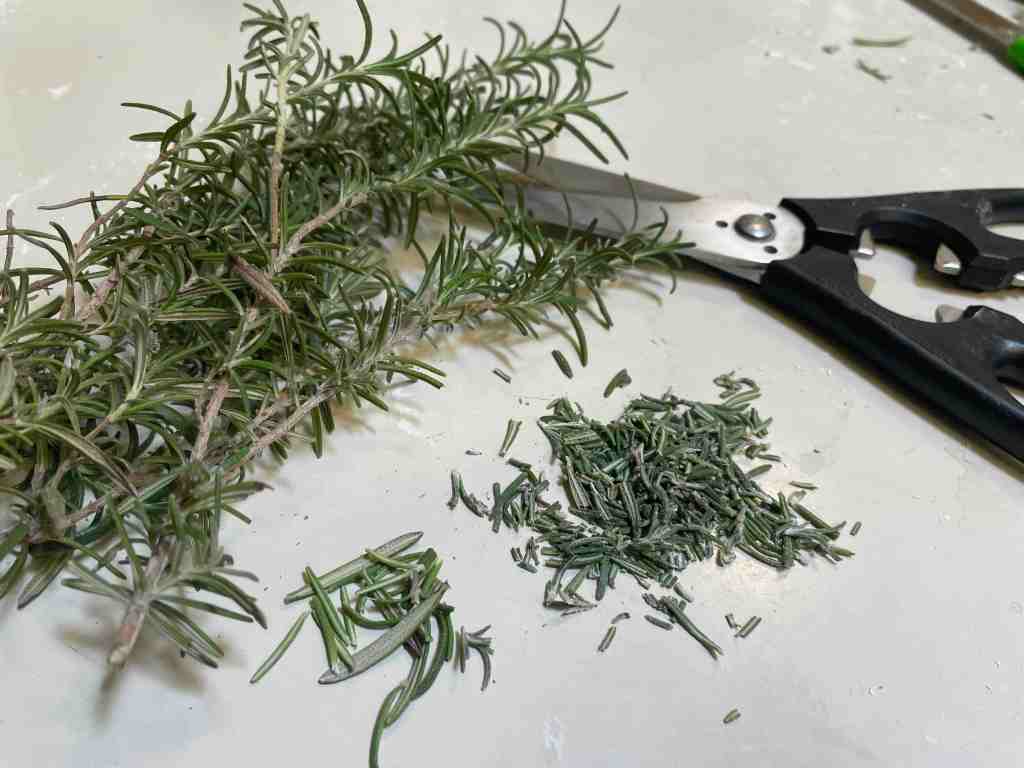
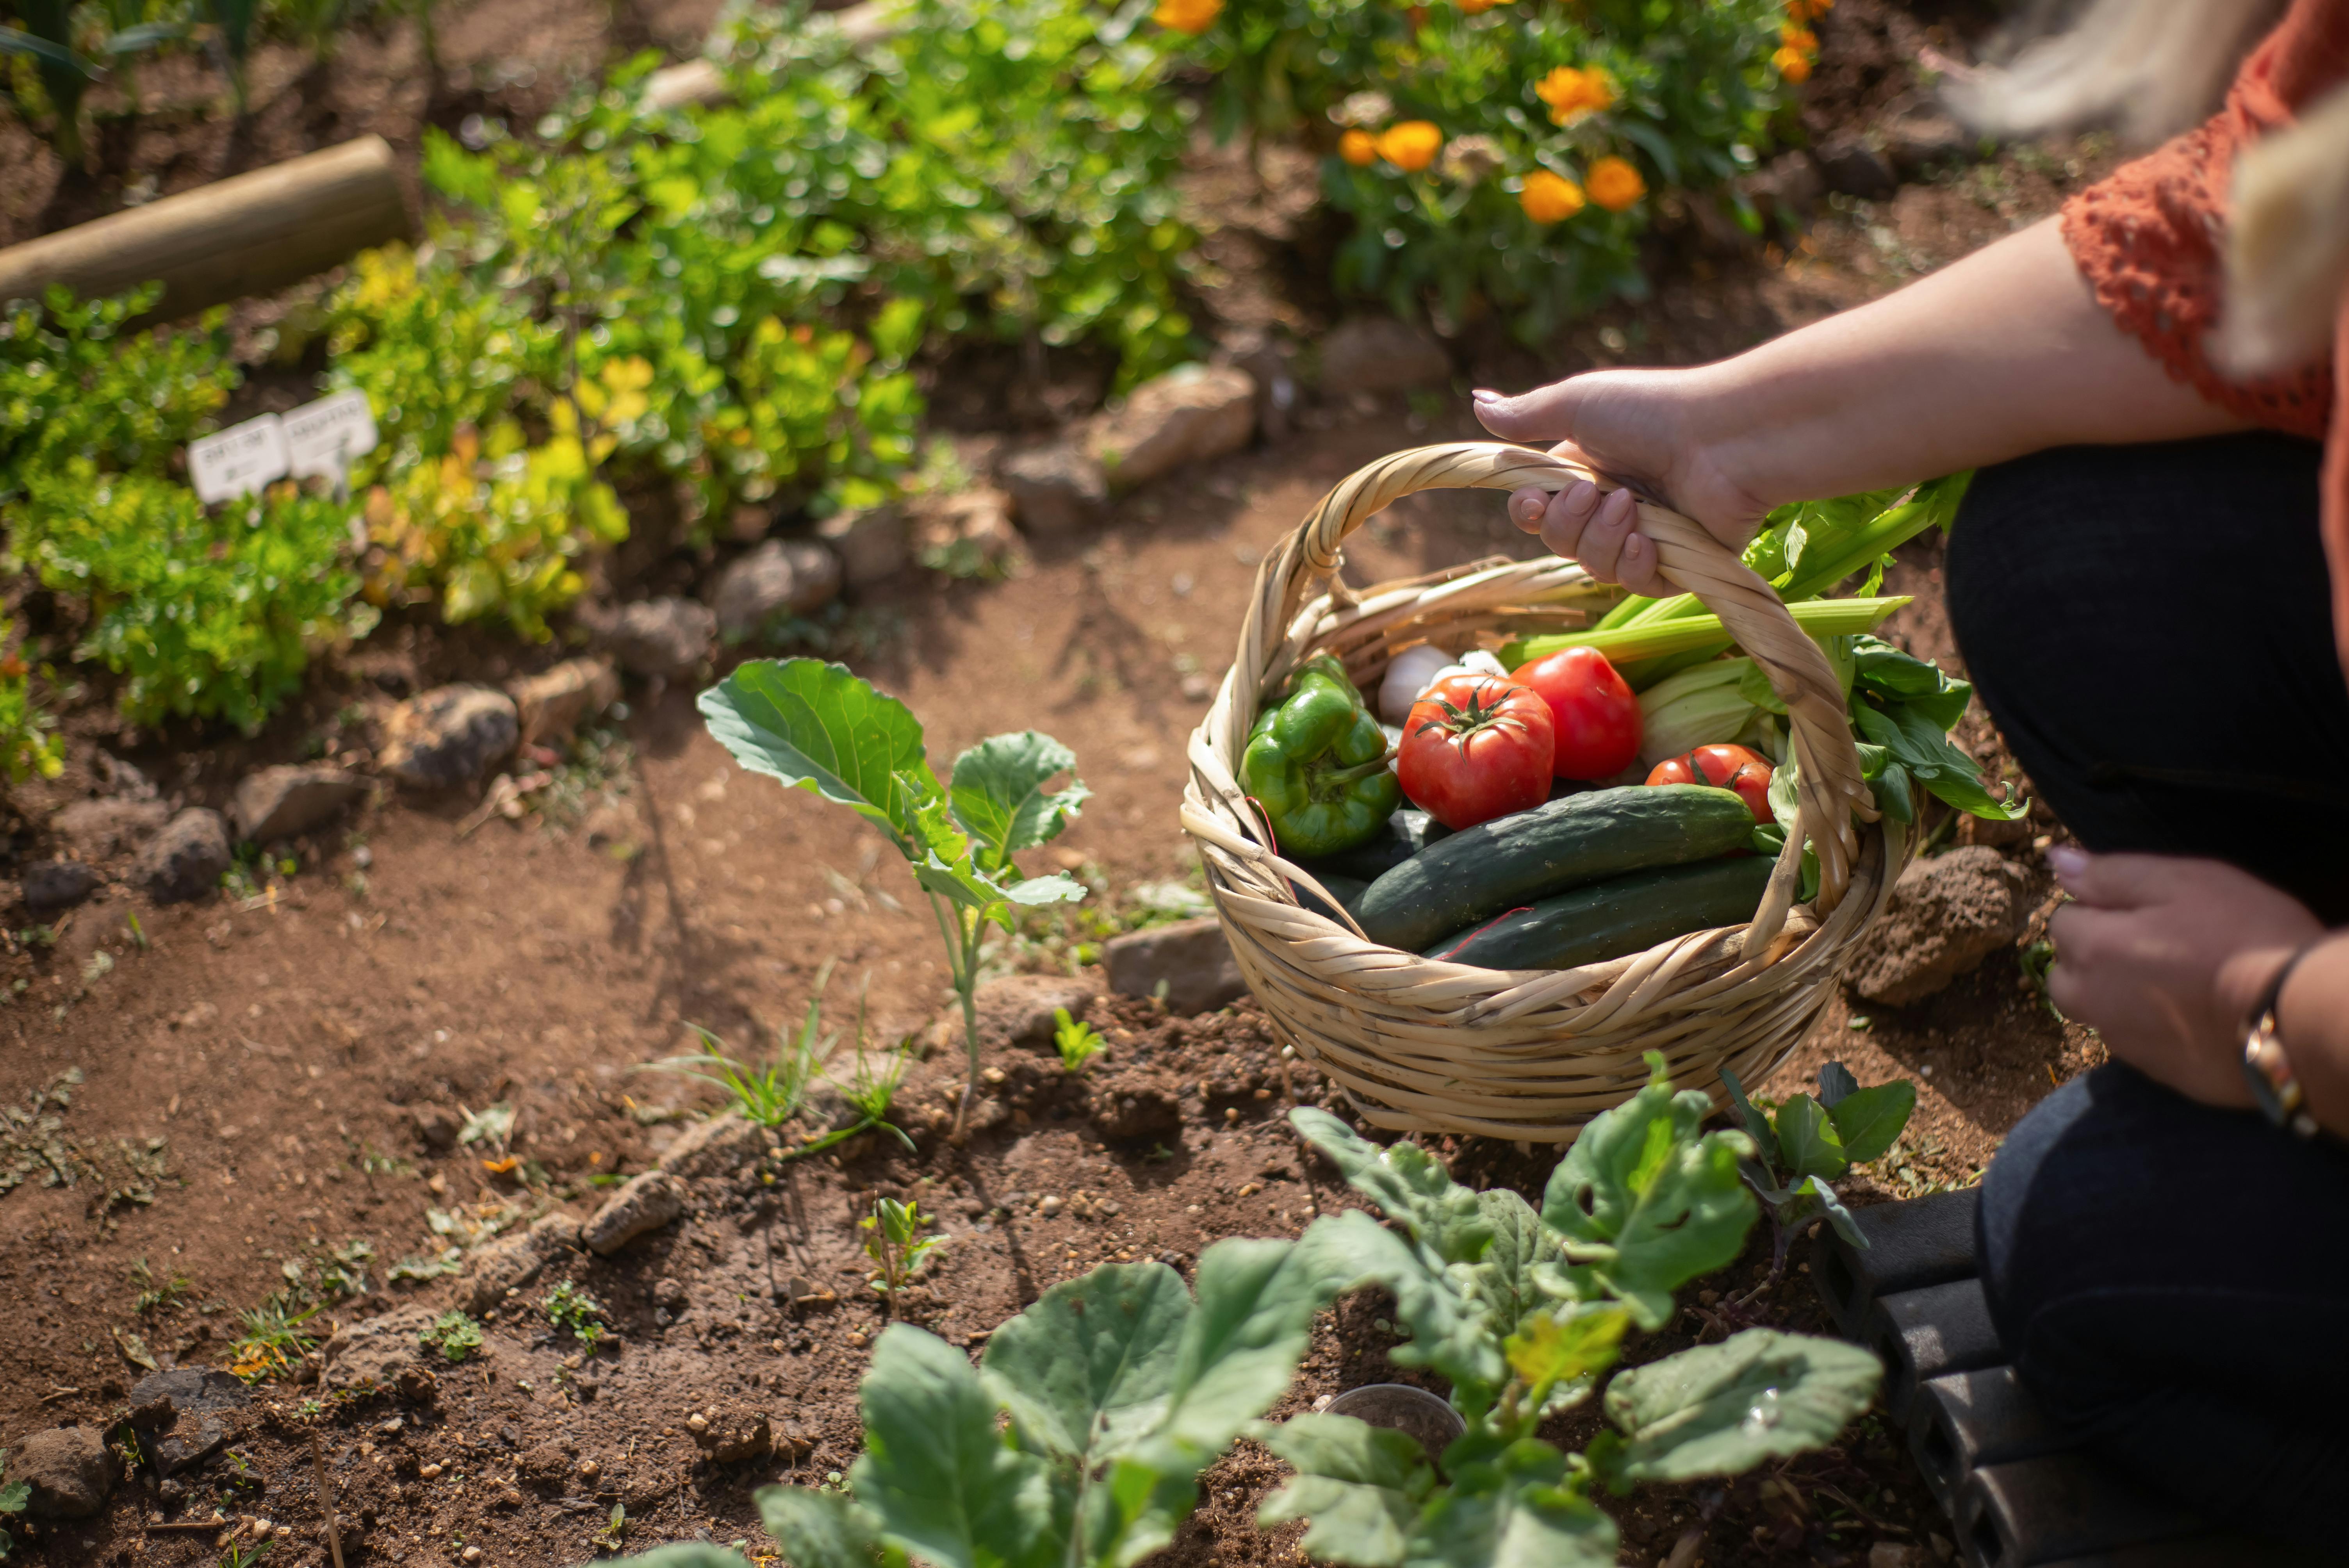
Inspired by rosemary-flavored flatbreads, I decided to try making a rosemary mesquite cracker with local heirloom wheat. Our garden supplied the fresh rosemary to cut into edible bits…. This local combination came out great:

Recipe: ROSEMARY-MESQUITE-PIMACLUB WHEAT Crackers

Ingredients:

3/4 Cup barley flour

1/2 Cup Pima Club wheat flour (from Ramona Farms, Sacaton, AZ)

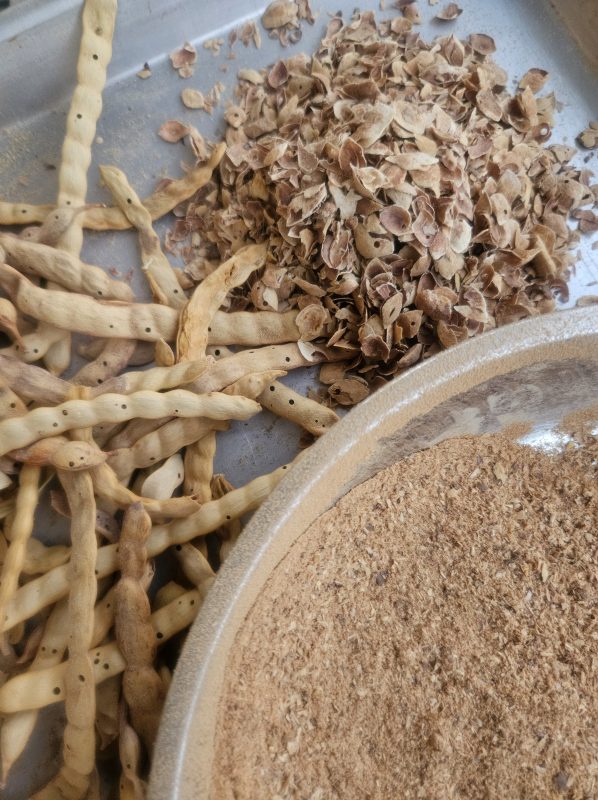
1/4 Cup mesquite pod flour (any more than this will become too strong a flavor)

1/2 tsp baking soda

1/2 tsp fine sea salt (I used Sea of Cortez pilgrimage salt crystals collected by a friend)

1/4 Cup oat bran

2 Tbsp non-fat plain yogurt

1/2 to 1 Cup low-fat buttermilk

1/2 tsp glob of mesquite honey (optional)

Optional “topping” suggestions: 1/8 tsp additional, dry, finely chopped rosemary leaf; 1/8 tsp crystallized sea salt; 1/2 tsp barrel cactus seed or saguaro seed; 1/2 tsp popped amaranth seed; 1 Tbsp grated aged cheddar

You’ll need a greased pizza pan or baking sheet, and a greased rolling pin.

Directions (similar to previous recipe):

Preheat oven to 350F.  Pre-soak rosemary bits in buttermilk to enhance flavor.  Sift together all dry ingredients except the oat bran.  Add oat bran separately as it will not pass thru sifter easily.  Cut yogurt into dry ingredient mixture.  Add buttermilk mixture gradually until dough is firm–not liquidy.

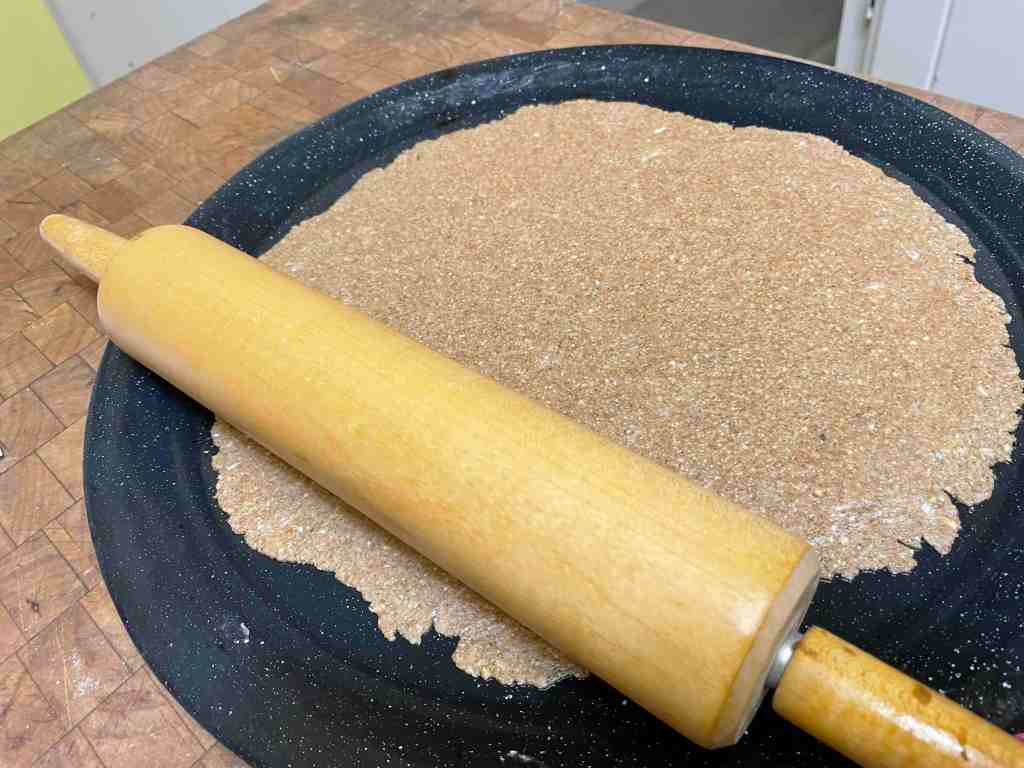
Place half the dough in center of greased pan and roll outwards until very thin and even (approx 1/8″ thickness). Be sure to tuck edges back to be equal thickness as center.

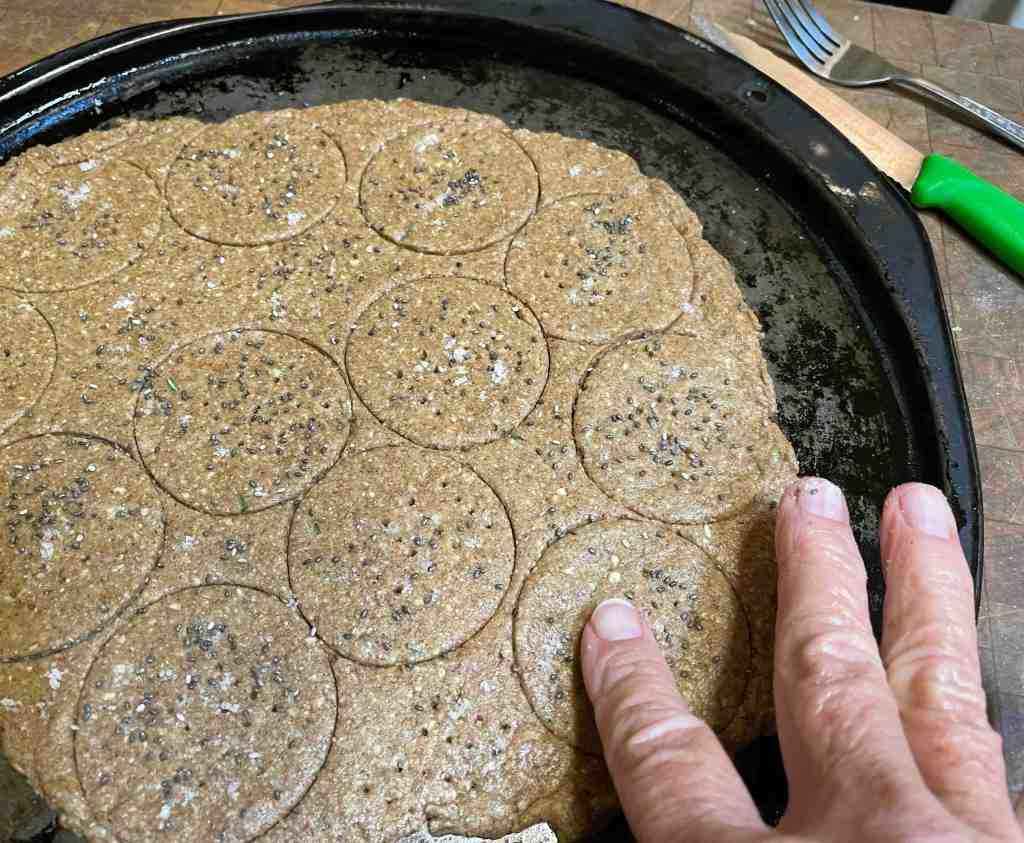
Sprinkle top of thinned dough with your desired topping. Here I’ve used rosemary bits, crystals of sea salt, and a sprinkle of chia. Pat the “topping” into the dough with your fingers so it will stick when baked. For this batch I used a cookie cutter through the rolled dough to make round crackers.

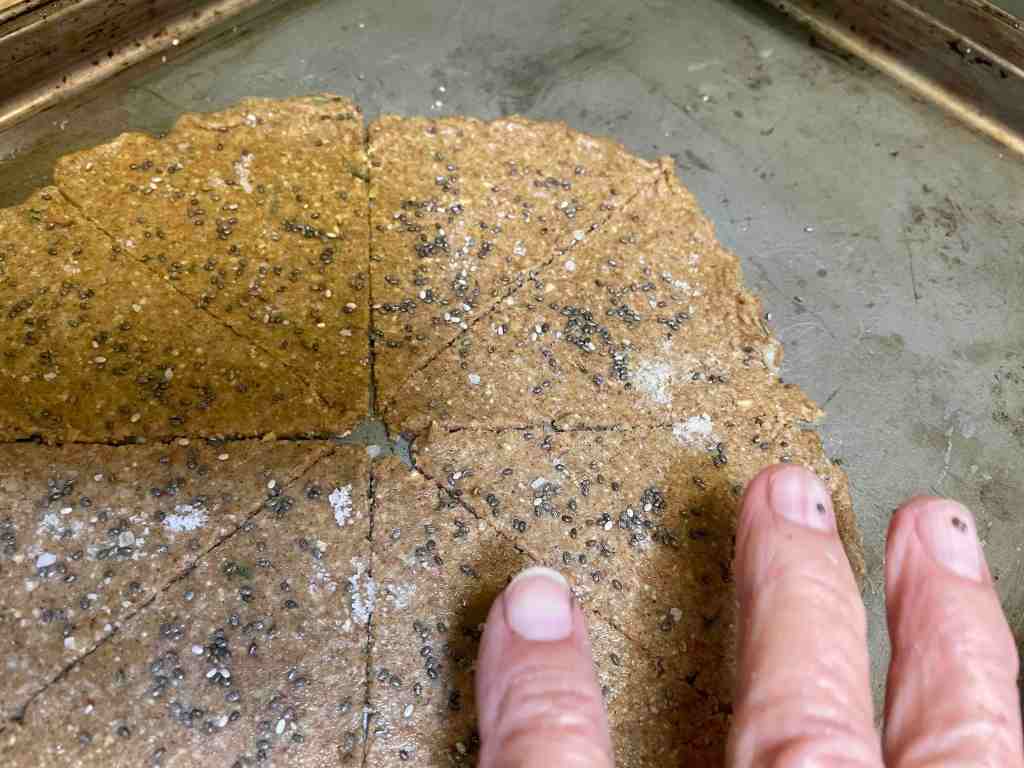
With the other half of the dough I used a greased rectangular pan which confined the rolling pin action to only two directions. Here I formed the dough into a thin circle to make “pie” wedge crackers.

Bake 8-10 minutes and check to see that the crackers have crisped. With metal spatula lift them from pan immediately to cool.

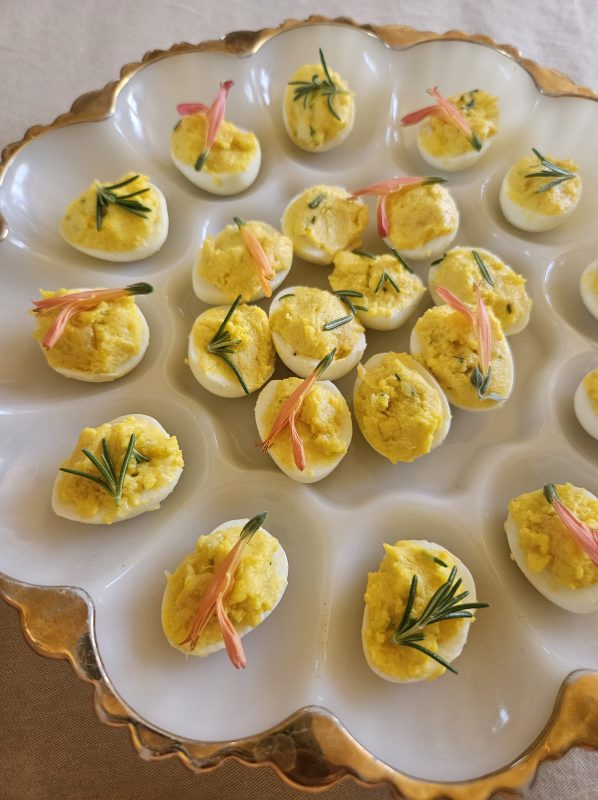
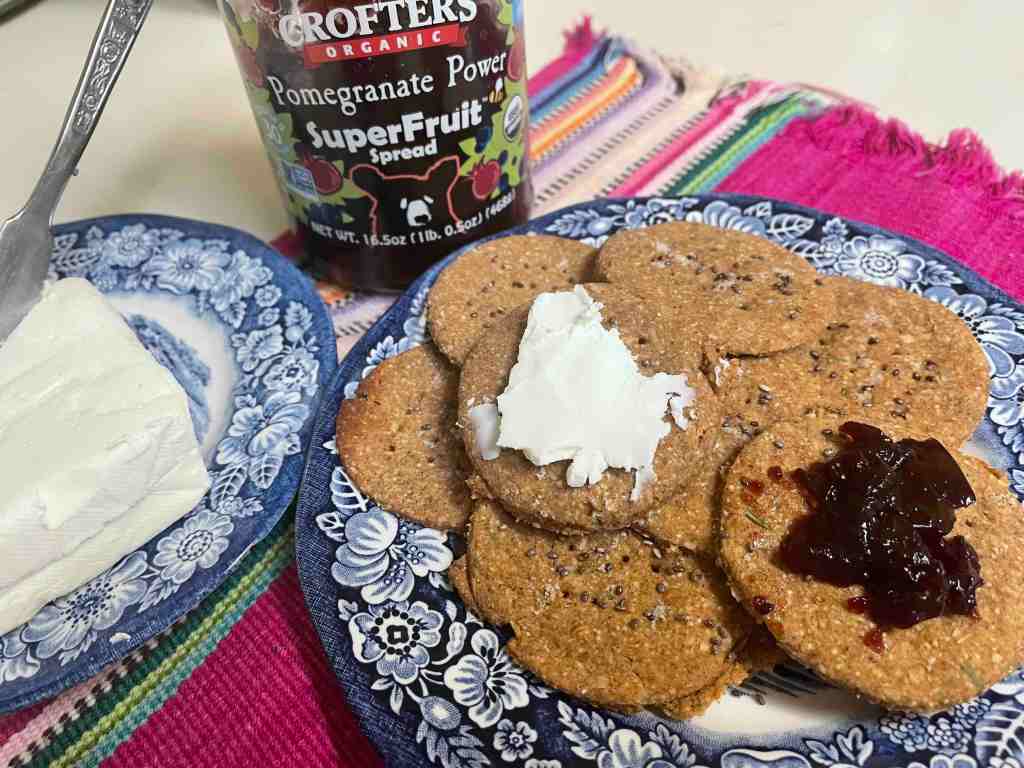
These Rosemary-Mesquite-PimaClub Wheat crackers are savory and pair well with cream cheese and jam, or as a foundation for colorful holiday canapes.

Lots of work goes into making crackers! But if our wonderful local desert grains aren’t available as crackers commercially, this is the only way to go. I challenge you to give them a try–to experiment with your own local grain combos!

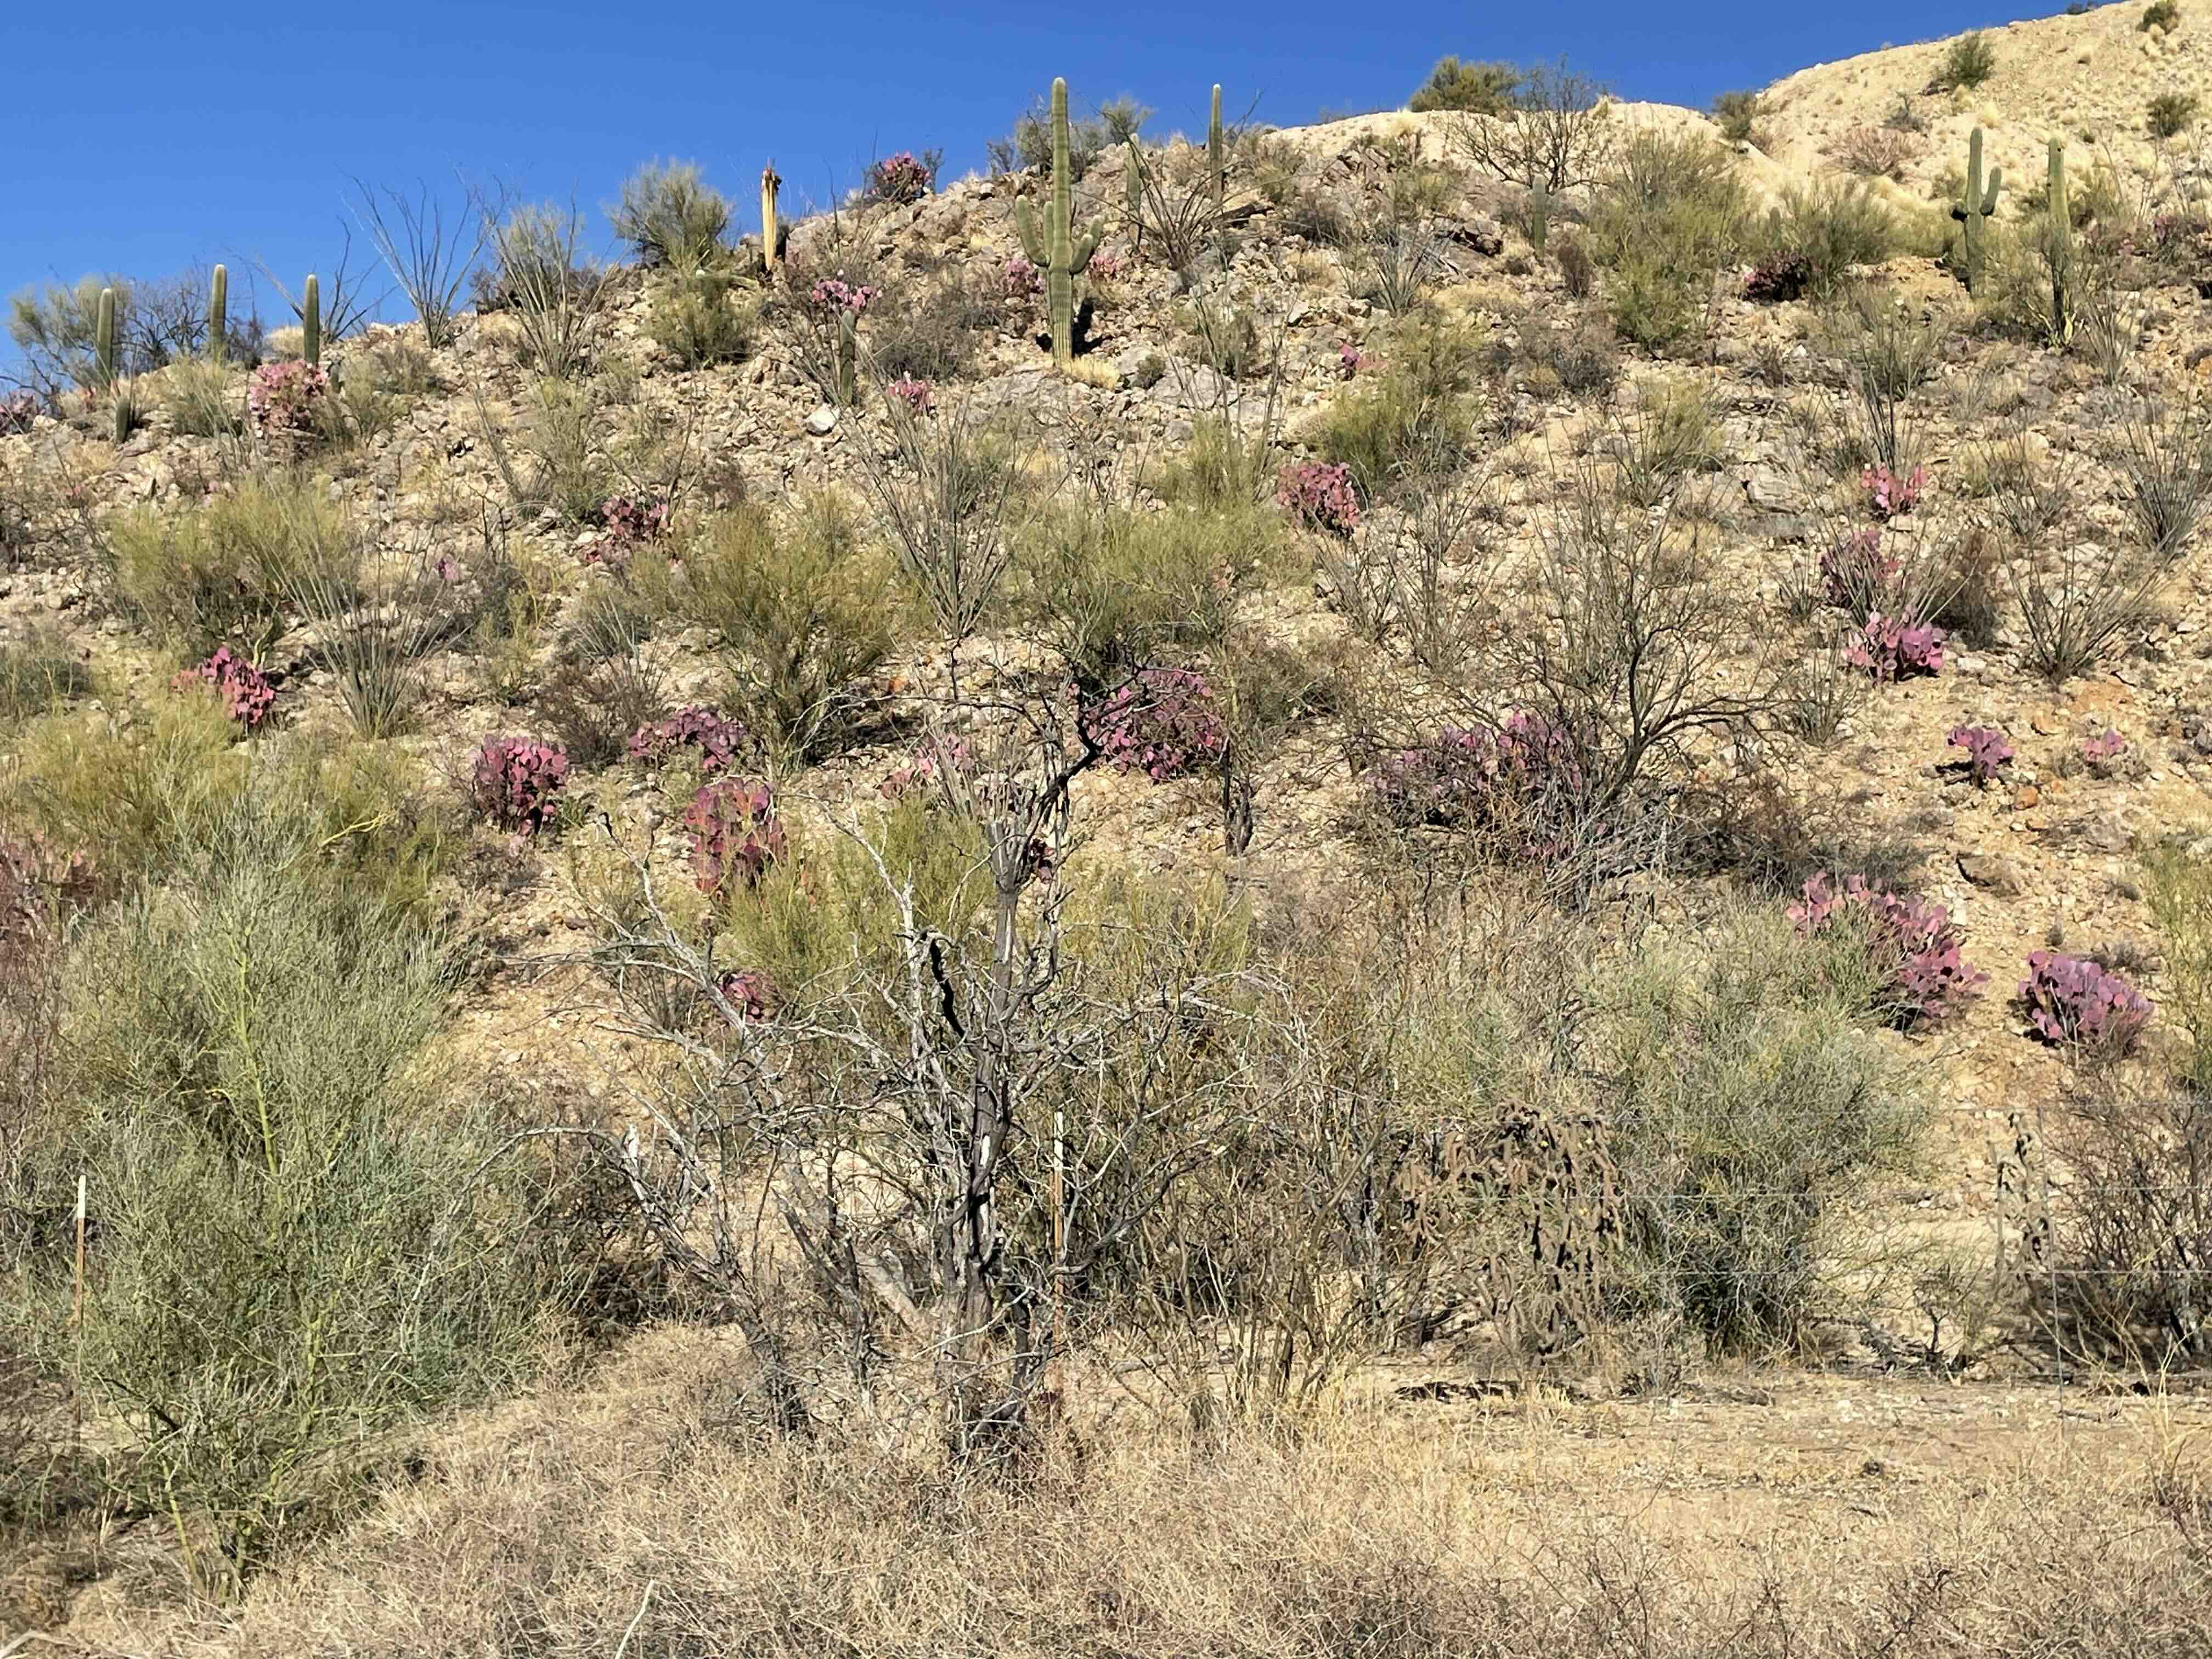
Crackers are best made in greater quantity–not piecemeal. I’ve had this vision of an Indigenous-owned and -operated enterprise, with ingredients sourced sustainably from the desert, someday filling this “cracker niche,” making good revenues and providing us all with nutritious, appropriate Southwest-flavored crackers….

Uncovering the Chocolate History of the Southwest

Chocolate drinking vessels found in Pueblo Bonito.

It may seem a stretch to discuss chocolate in a blog on Southwest food. But chocolate has been in the area since the 9th century. It’s Carolyn writing today and as a chocolate addict, I find the history of chocolate in our area fascinating. In the late 1800s, rancher Richard Wetherill was poking around in Pueblo Bonito in Chaco Canyon in the Four Corners area and excavated 111 cylinder jars. Archaeological technology has advanced greatly since then and researchers have dated the strata in which they were discovered to 1000 CE. Even more interesting, substances inside the jars and in pieces of broken jars indicate that the jars contained chocolate. Since the jars were all found in one room, scientists speculate that the chocolate was being used ritually. Archaeologist Dorothy Washburn also found residue that appears to be from chocolate in bowls from the site of Alkali Ridge, Utah, that date to 780 CE, even earlier.

Consider that the closest place chocolate was grown was 1,200 miles south in Mexico. This was before draft animals were used, so a trader or a series of traders carried chocolate all that way on their back, along with macaw feathers and copper bells.  With all that travelling, chocolate must have required quite a bit of turquoise and other goods in exchange.  

The Spanish Bring Chocolate to the Southwest

When the Spanish missionaries and soldiers came north to what we call the Southwest, they brought chocolate, one of their very few luxuries. Chocolate, being a New World crop, was much less expensive than tea, which had to come by a months-long trip across the Pacific Ocean from Asia. Their drink wasn’t the creamy concoction we now savor. Then chocolate was mixed with water and sometimes honey to sweeten it.

Father Phillip Segesser, one of the earliest priests at San Xavier Mission in Tucson, complained in a letter to his Swiss relatives that every non-Native visitor expected to be served chocolate. Father Segesser lived a very humble life, and he found this presumptuous. It is also interesting that provision orders from the day for both soldiers and priests listed both ordinary chocolate and fine chocolate, the later of which cost twice as much. We can guess what Segesser served his visitors.

During the 1781 Yuma uprising near modern day Yuma, Franciscan priest Fray Francisco Garces requested that he be allowed to finish drinking his chocolate before being beaten to death by the Quechans.

 I was happy in two recent trips to learn more about my obsession. In the large green house at the Atlanta Botanical Garden, I saw a cacao tree up close and was amazed to learn that the flowers grow right from the trunk.


Cacao tree in flower in the Atlanta Botanical Garden. See a small green chocolate pod in the upper right.

In Guatemala, I visited an artisanal chocolate maker. I got to see all aspects of converting a cacao bean into a chocolate bar, from opening the pod, to cleaning the beans, then roasting them on a comal before grinding them to a paste and adding sugar.

Just opened cacao pod. The seeds are inside the white covering.

Guatemalan artisan chocolate maker roasts cacao beans over coals.


The roasted beans are ground, combined with sugar, and formed into a patty. They are surprisingly oily. Perhaps patties like this were what the early traders brought to Pueblo Bonito in Chaco Canyon. 

Chocolate pairs so well with our  mesquite meal–a perfect blend of tropics and desert. These waffles will make a holiday breakfast treat.

Chocolate Mesquite Waffles

½ cup all-purpose flour

½ cup whole wheat flour

½ cup mesquite meal plus 1 tablespoon

3 tablespoons cocoa

1 tablespoon baking powder

½ teaspoon salt

2 egg yolks

1 ¼ cup milk of choice

½ cup oil

2 egg whites beaten stiff

In a large bowl, sift together dry ingredients. In a small bowl, combine egg yolk, milk and oil. Stir the wet mixture into the dry ingredients. Fold in egg white, leaving some fluffs. Do not over mix. Pour batter into hot waffle maker and follow manufacturer’s directions.

Makes about 8 waffles.

Recipe adapted from Eat Mesquite (2011) by Desert Harvesters

__________________________________________________

You can learn more about the history of food in Southern Arizona in my latest book A Desert Feast, the story of the last 4,000 years of food in the Sonoran Desert. Want more recipes using  foods of the Southwest? You’d find ideas for collecting and using 23 easily recognized and gathered desert foods in Cooking the Wild Southwest: Delicious Recipes for Desert Foods.  . Recipes from top Southwest chefs are collected in The New Southwest Cookbook. Just click on the titles for more information. You can learn more about me on my website.

Elder Native Plant Medicine: Make Your Own Elderberry Syrup

Elderberry (Sambucus nigra, synonymous with Sambucus mexicana) or tapiro in Spanish is a beautiful shrub that grows wild in many riparian places in the low desert of Arizona and Sonora, Mexico, or at higher elevations such as the sky islands of the Sonoran Desert and borderlands, in Europe, and beyond. In traditional/natural medicine, it has long been prized for its strong antioxidant qualities and is excellent for treating colds, coughs, and the flu. You can read many scientific studies like this Randomized Study on Influenza (Zakay-Rones Z, 2004) or Treatment of Upper Respiratory Symptoms (Hawkins, 2019) that have confirmed these benefits. The berries are not safe to eat raw or uncooked–but when cooked (at least 15 minutes to vaporize the harmful compounds), elderberry’s flavor is totally safe and naturally sweet.

Elderberry marmalade purchased in Magdalena, Sonora

Sister Emily here to share a popular immune-boosting syrup recipe made from this wonderful plant. I’ve harvested tapiro or elderberry from Tubac near the Santa Cruz River, on Mt. Lemmon in the Santa Catalina Islands, and near washes in the east side of Tucson. Also in Catalonia in Spain!

Dr. Wendy Hodgson’s excellent book “Food Plants of the Sonoran Desert” (pictured) describes the traditional uses of elderberry by the O’odham, Pima, Cahuilla, and Yavapai (Hodgson, 2001). Her research found that native people of the Sonoran Desert have always used elderberry fruits for food, medicine, and wine, and in some cases the flowers, too.

My Bulgarian musician friend says they prize the woody stems of elderberry for their long straight stems prized for making wood instruments.

Elderberry Syrup Recipe

I recommend keeping this delicious syrup medicine around all the time, or especially when the seasons change (to ward off colds and the flu).
Makes about 1 cup of finished syrup. (Ingredients can all be doubled for larger batches.)

Ingredients

  • 1 cup dried organic elderberries OR 2 cups fresh wild-harvested* elderberries, destemmed and rinsed.
  • 2 cups filtered water
  • 1/2 – 1 cup raw, local honey**, depending on amount of liquid. Meet your local beekeeper at a farmer’s market!

Optional Ingredients:

  • Herbs: 1/2-1 tsp. organic dried ground ginger, 1 stick of cinnamon, and/or a few cloves.
  • Brandy or vodka- some people add 1/2 cup of either of these alcohols to further preserve the syrup and increase shelf life

*For foragers, always use caution to ensure you have properly identified the elderberry plant (Sambucus nigra or Sambucus mexicana), which is relatively easy.
**Do not feed infants honey.

Instructions:

  1. Combine elderberries (and optional herbs) with cold water in pot and bring to a gentle boil.
  2. Reduce heat and allow to simmer 30 minutes.
  3. Turn off heat and allow to slowly cool and steep for at least half an hour.
  4. Strain to obtain the elderberry liquid into a measuring cup. To capture the most liquid, you can also use cheesecloth or mesh cloth and squeeze out as much as possible of the cooled liquid.
    Note: Don’t pitch those power-berries! The strained elderberries can be used as a immune-boosting topping for yogurt or oatmeal!
  5. Check the volume of the elderberry liquid. Check that you add honey in a ratio of half of this volume. (1 cup of elderberry liquid requires 0.5 cup of honey.) This will ensure that the syrup won’t spoil.
  6. Pour elderberry and honey back into the pot, and gently heat just enough to stir and incorporate the honey. (Heating honey too much will destroy valuable enzymes and beneficial antioxidants).
  7. Add optional brandy or vodka, if desired as an additional preservative.
  8. Pour into a clean glass jar and store in the refrigerator.
  9. Take a tablespoon (or two!) when you are feeling a little low or a bug creeping in, or just for a pick-me-up boost to the immune system. It’s also just a sweet treat.

Storage and Use:

This powerful syrup will keep 2-3 months or longer if stored in the refrigerator. I have also found my syrup to be stable (mold-free) for even longer, and tastes just fine! The natural preservative of honey is the key.

Want to make the syrup even easier? It’s hard to beat this very convenient complete Elderberry Syrup Kit from Tucson Herb Store on 4th Avenue in Tucson. Click to see this excellent option for purchase and included recipe by Ms. Amanda Brown.

References

Hodgson, Wendy C. Food Plants of the Sonoran Desert. University of Arizona Press, 2001. JSTOR, https://doi.org/10.2307/j.ctv27jsm7t

Hawkins, Jessie, et al. “Black Elderberry (Sambucus Nigra) Supplementation Effectively Treats Upper Respiratory Symptoms: A Meta-Analysis of Randomized, Controlled Clinical Trials.” Complementary Therapies in Medicine, vol. 42, Feb. 2019, pp. 361–65. DOI.org (Crossref), https://doi.org/10.1016/j.ctim.2018.12.004.7/147323000403200205

Zakay-Rones Z, Thom E, Wollan T, Wadstein J. Randomized Study of the Efficacy and Safety of Oral Elderberry Extract in the Treatment of Influenza A and B Virus Infections. Journal of International Medical Research. 2004;32(2):132-140. doi:10.1177/147323000403200205

Pods to Meal to Cookies at home, TODAY!

Hello friends, Amy here with a baked good I made last week. I wanted to bring treats to share with my friends, something we could nibble while we passed the break table. And if no one had to wash plates, forks or spoons, that was a bonus. My people truly delight in cooking, hadn’t had anything mesquite in ages, and I wanted to impress. After considering my options for a month, I suddenly realized… that’s this afternoon!!!

Drought makes for patchy harvesting, but I had a stash of pods. The trick to making HOME grinding work, especially in humid weather, is to toast the pods RIGHT before grinding. No community mesquite pod milling event near you? Need that mesquite meal TODAY? No problem!

I baked in a thin layer at about 275 degrees F with convection for maybe 5 minutes. Try longer if you don’t use or have a fan. It should smell sweeeeet. I opted to not develop any golden color, but that’s an option!

After cooling JUST enough to handle easily, I tossed the pods into a high powered blender. A regular blender or food process does not suffice. Without the last minute toasting, grinding makes a paste in there. This of course is an issue with any mesquite meal grinding method, but expecially for the blender or stone tools.

Unbelievablly, it only takes a few pulses.

Any fine sieve or a flour sifter can remove the meal form the hard bits of unground pod and seed. Any grinding method will require this step, even hammer mills.

Sifting is even faster than grinding, depending on the size of the holes and quanity of mesquite meal needed.

To show off this flour, I impulsively chose a simple recipe from this small out of print book. However, you can purchase the huge current edition!

Chocolate chip cookies! I had a half bag of chocolate chips and pecans on hand, and chocolate with mesquite is classic. In case my butter spent too much time in the freezer, I doubled the vanilla. No brown sugar in sight, but a gallon of mollassas to use up.

I love making my notes in hard copy cookbooks, and reading the kitchen culture from long gone relatives in their books. And the bookmarks that are labels from my friends’ gifted food creations are my kind of treasures.

I baked these chocolate chip oatmeal mesquite pecan cookies until just barely set, let them finish cooling in transit, and served them chewy with the chocolate still melted. I’m sure they would not tolerate stacking. Some were full sized, the others bit sized. None were leftover.

Happy autumn!

A Foraging Consciousness for Famine Times

We aren’t alone. Living through this extended drought and awesome heat in the Sonoran Desert is a major feat for any creature out there–plant or animal–no matter how desert-adapted it may be! We are all feeling it. Difficult to imagine how creatures, like the long-lived desert tortoise, manage through the kind of intense drought we are experiencing.

Even in my back yard, my tended prickly pear, covered in buds and tender nopales last April, is ending this summer with tunas dropping before mature or devoured by cactus wrens, and pads chomped by packrats or ground squirrels.

Tia Marta here to share some thoughts about us humans harvesting from the wild. As I learned from my Tohono O’odham mentor, in earlier times Indigenous people had to suffer through lean times using the desert foods they’d stored from times of plenty. They knew sporatic seasonal productivity is the name of the game in the desert. Wise cultural tradition dictates that you harvest abundance when it happens, share your plenty, and store as much as possible against the expected lean times.

Very few native prickly pears have produced fruit this year in the Sonoran Desert, so as human desert harvesters I feel we must refrain this year, and consider the needs of our wild neighbors, the deer, javalina, cottontails, rodents, birds, etc who need what forage remains– far more than we do.

Instead, I suggest we go for an invasive! How about eating from the white lead tree, known as guaje in Mexico, huaxin by the Aztec in its region of origin? Its presence as an invader into the Sonoran Desert generates interesting controversy. The seeds contain an amino acid mimocine toxic for us mammals who have no rumen for digestion. However Guaje‘s young pods, when green, can be cooked in soups or in tacos, as cooking removes the toxicity. This small fast-growing tree has other positive attributes: It is used as great cattle fodder, provides stovewood fuel, erosion remediation, herbal medicine, and it adds soil nitrogen. Its profuse and often continued flowering makes it a good pollinator support. Caution: it IS an invasive species and, if let loose in our desert, could compromise our precious natives..

Guajes (Leucaena leucocephala) have been known and appreciated in Sonora, Mexico, for decades if not centuries. It is planted on the University of Arizona campus (see UA Arboretum) and is being researched as a potential future food plant for climate change by horticulturists at Mission Garden. I’m glad guaje volunteered in our yard from soil in a potted plant. It created a little grove of blessed shade for us, and bees have been abuzz over its puffs of cream-white flowers every spring.

I recently gathered a gallon bag of dry pods which yielded only 1/8 cup of small seed. They resemble flax seed. I soaked them to see if any were viable. About 1/3 of them swelled. When cooked for 15 minutes to remove mimosine, and drained, they proved nut-like and tasty. I’m adding them to my home-made bean dip. As a legume they will provide good protein in addition to texture and new flavor.

To go with the dip, I’m using a scant amount (a tablespoon per 8oz) of my conserved prickly pear juice, harvested and frozen August last year, with flavored fizzy, gingerale and a splash of mescal. With this dressed up punch, we’re sending a toast to all desert creatures out there! We hope they are benefitting from any prickly pear tunas that may be ripening in our hot, dry desert!

May we be conscious of all the plants and animals around us during these weather-stress times! For more ideas on local “famine foods” see SavorSister Carolyn’s post and Tia Marta’s post. For ideas of what we can grow in prep for more climate extremes, check out Ethnobotanist Gary Paul Nabhan’s inspirational book Growing Food in a Hotter, Drier Land: Lessons from Desert Farmers on Adapting to Climate Uncertainty.

A colorful assortment of Tia Marta’s watercolor art-notecards depicting Southwest Native American heirloom foods can be found at the Mission Garden shop, or online at NativeSeeds/SEARCH.

Sonoran Summer Tacos with Nopales and Verdolagas

It’s Carolyn today and I’m out in my garden to pick some delicious and healthy vegetables to bring you a season-spanning recipe. If your Ficus Indica prickly pear (the Mexican tall kind) sent out its leaves a little late this spring, you probably have a few smaller pads that are still tender enough to cook. Combine those with the purslane in your summer garden for a delicious vegetable side dish or taco filling.  If you don’t have your own cactus. you can always pick up some nopal pads at any Mexican grocery store. If you buy the kind already cleaned, you’ll need to use them right away as once they are scraped, they go bad quickly. We have previously discussed how to clean prickly pear pads here. 

We’ve also discussed purslane previously in this blog here, but I’ll copy the nutritional information because it is so important:

It’s sad but true that right now people are out in their yards pulling these plants out and tossing them in the garbage (or compost for the more enlightened). They should be tossing them in the wok  or frying pan (see recipe below.) Purslane provides six times more vitamin E than spinach and seven times more beta carotene than carrots. It’s also rich in vitamin C, magnesium, riboflavin, potassium and phosphorus. One cup of cooked purslane has 25 milligrams (20 percent of the recommended daily intake) of vitamin C.

Especially important to those of us eating a modern diet, purslane is very high in an essential omega-3 fatty acid called alpha-linolenic acid (ALA). Omega-3s are a class of polyunsaturated essential fatty acids. Your body cannot manufacture essential fatty acids, so you must get them from food. Certain fibers also help in controlling blood sugar.

If your aren’t familiar with purslane or verdolagas, here’s a closeup photo:

Here are all your ingredients for the tacos: (top) prickly pear leaves and purslane, (bottom) onion slices, garlic and poblano chile.


This is what the ingredients will look like cooked.

Sonoran Summer Tacos

2  2×4-inch prickly pear pads or equivalent

½ white or yellow onion

2 cloves garlic, minced (1 teaspoon)

2 tablespoons neutral vegetable oil

1 cup verdolaga (purslane), packed

1 roasted, peeled, cleaned Anaheim or poblano chile, cut into pieces

      (or 2 tablespoons chopped canned green chiles)

4 corn tortillas or small flour tortillas

2-4 tablespoons crumbled cotija cheese or cheese of choice

Using rubber gloves, clean the stickers from the prickly pear pads. Rinse and cut into pieces 2 inches by 1/8 inch (roughly the size of a wood matchstick.) Set aside.

Cut the onion into thin strands by cutting from the root to the stem (not crosswise). Add the oil to a heavy frying pan and begin sautéing the onion over low medium heat. You want it to cook slowly until soft and light brown. After about 10 minutes, add the garlic. While that is happening, you can prep the rest of the ingredients.

Cut the fresh chile into pieces about 1 inch by 1/8 inch. Chop the verdolagas (purslane) roughly. After 10-15 minutes when the onions are ready, stir in the greens and chile and continue to cook.

Coat a heavy frying pan with a light spray of oil and soften the tortillas. Divide the vegetables among the tortillas. Sprinkle with cheese and fold over.

Every recipe writer whether for a blog or cookbook, needs a taste tester. Is it good? Would you eat it again? Here is my taste tester who has eaten his way through five cookbooks and dozens of these blog posts over forty years.

Chief taste tester Ford Burkhart works his way through the Sonoran Summer Tacos for lunch. He gave them the thumbs up. 

____________________________________

You can learn more about the history of food in Southern Arizona in my latest book A Desert Feast, the story of the last 4,000 years of food in the Sonoran Desert. Want more recipes using  foods of the Southwest? You’d find ideas for collecting and using 23 easily recognized and gathered desert foods in Cooking the Wild Southwest: Delicious Recipes for Desert Foods.  . Recipes from top Southwest chefs are collected in The New Southwest Cookbook. Just click on the titles for more information. You can learn more about me on my website.

Gathering the Desert, and Gathering Around Honey Wine

Honey, the golden elixir of the bees, is famous for its impressive shelf stability, or resistance to spoiling. By its nature, it can remain edible for an extraordinarily long time. In grade school, I remember delighting in the fact that archaeologists found honey in King Tutankhamun’s 3,000 year old tomb. Cave paintings in Africa dated to thousands of years ago depict honey hunters who braved a defensive colony of bees (Hollmann 2015) to access the calorically valuable, medicinal, and tantalizing substance which could be consumed or stored long term. 

I love to think about the early honey harvesters of Africa and imagine the first time someone combined honey with water, and fermentation soon began–an exciting transformation took place! This is thanks to the action of microbes (as is commonly the case, at least with fermented foods). While humans crave the complex sweetness of honey, it turns out that honey is a favorite food of some microbes such as Saccharomyces cerevisiae, a species of yeast. The yeast consume the honey and convert it to alcohols and carbon dioxide. 

Honey wine, T’ej…sweet and warm like the solstice evening light.

It is thought that honey wine known as t’ej (say: “tedge”, with a soft d) originated in Ethiopia and Eritrea, and upwards of 5 million people consume t’ej on a daily basis (Belay n.d.). However honey wine variations are found in many parts of the world including Mexico and Poland (Katz 2012). You may know t’ej by its other name of mead, an alcoholic beverage made by fermenting honey with water. It is truly simple and fun to make t’ej at home by adding raw unpasteurized honey (which contains natural yeasts that kickstart fermentation) with pure water, but you can also add an endless variety of edible botanicals like herbs and fruit to create a unique or medicinal mead. While mead can be aged for months, you can drink it “young” after only a couple weeks of high-energy fermentation. What kinds of honey wine will you make to share with family and friends?

I was inspired to make t’ej for the first time by my friend Andrias Asnakew, a Tucsonan of Ethiopian descent who established Brillé Mead Company here in 2023. I was honored to share homemade t’ej with him and his welcoming friends who hosted us on Easter, clinking glasses as they described the traditional recipe. They taught me that East African t’ej is traditionally made with honey, water, and the leaves of gesho (Latin name Rhamnus prinoides, a plant native to southern and eastern Africa) which adds a distinct bitter flavor and wild yeast to start the brew (Belay, n.d.). I am grateful for the family’s hospitality and generosity, and to Andrias whose knowledge guided me through the process.

Friends gathering with traditional t’ej (Ethiopean honey wine).

Around the time I was pondering which ingredient to include in my first mead, I was marveling at the crowns of white trumpeting blossoms on the haan (Tohono O’odham name for the native saguaro cacti). I wondered what saguaro fruit honey wine would taste like? It seemed that using fresh red bahidaj saguaro fruit would be a perfect way to celebrate the solstice on June 20th, and to harken for rain on Dia de San Juan on June 24th. (For more on saguaro traditions, enjoy reading about the Tohono O’odham’s beloved bahidaj saguaro fruit from teacher Muffin, known as Sister Marta here at Savor the Southwest blog: Summer Solstice, and Sister Carolyn’s It’s Saguaro Season.). This mead would be fully Sonoran desert, made from local honey and saguaro fruit…

Bahidaj (Tohono O’odham for saguaro fruit), June 2025

I am glad to report that my first batch of honey wine/mead/t’ej was a happy success (recipe to follow) with very little cost and effort. The tasters gave feedback that the flavor is more dynamic than they expected, with real body and interest. There’s a bit of liveliness, but it’s not bubbly. Many folks commented on its balance: a little citrusy, and not too sweet; a light fruitiness, and warmth from the honey. There is a pleasant yeastiness like fresh bread, though it doesn’t taste strongly of alcohol. We all noted the way it gently, pleasantly nudges you toward relaxation (I estimate the percent alcohol of my brew 4.5-5% ABV). If you prefer a stronger t’ej, you can increase the amount of honey, or a lighter less alcoholic brew can be made using less honey. 

The recipe is so flexible and invites endless experimentation. The ratio of honey to water is anywhere from 1:4 (one part honey added to four parts water) to 1:16 (for a very light mead, or if you’re adding a lot of sweet fruit also). The variety of creative optional additions is endless: fresh or dried fruit (berries, native fruits encouraged), herbs (lemon balm, rose, mint) or spices (ginger, cardamom, cloves, or cinnamon). Take notes of your selection, process, and quantities. Andrias started experimenting with different flavors: strawberry, carkeda (hibiscus), habañero. It is a natural beverage; you know exactly what went into it when you make it yourself.

Recipe for Honey Wine (T’ej or Mead)

This recipe was adapted from Sandor Elix Katz’s excellent book, The Art of Fermentation, with inspiration and guidance from Ethiopian t’ej maker Andrias Asnakew (Tucson, Arizona). 

This recipe yields about 2+ gallons mead (can be scaled), potentially 4-5% alcohol, approximately (a hydrometer can measure this precisely if you wish)

1 quart local raw honey (32 ounces)– my personal favorite is Tucson Honey Company from Tucson local farmer’s markets.  
2 gallons+ pure, filtered water (~260 ounces) (if tap water is the only option, see below**) 
~1 cup raisins, optional but recommended to feed the yeast–added a little at a time.
Optional ½ teaspoon mead yeast (such as strain EC-1118. Check your local brew shop or find online).
Optional fresh or dried fruit (local and native fruits encouraged), herbs or spices. Experiment with quantity: a few cups of fresh fruit, or maybe around one cup if of dried herbs. For spices, try a handful or so and see how it goes. 

Ripe saguaro fruit

1. Clean a ~2.5 gallon fermentation vessel (ideally glass or stainless steel, but food grade plastic works). Wide mouth is best. 

2. Pour the honey into the vessel, and add about half the water. Stir stir stir till it dissolves, then add the rest of the water, leaving just a few inches at the top for bubbles and stirring. Cover with a cloth or loose lid, and place on a baking sheet to catch any drips. Add optional yeast, and optional fruit or herbs/spices.

Dissolve honey in pure water to start the fermentation process.

3. This is Day 0. Leave in a cool spot in the house where you’ll walk by frequently. I keep a long stirring spoon next to the vessel and stir it often, daily (at least two or three times+ daily). This introduces air for the yeast. Sandor Katz recommends we stir a few revolutions, then reverse the stir quickly to introduce air (biodynamic style!). Delight in the bubbles and give your greetings to the millions of hungry microbes hard at work! 

Full quantity of water mixed with honey. Ready to ferment!

4. After a few days of frequent stirring, you should start to see more and more bubbles when you stir. The yeast is waking up. This is Day 3. Add a palmful of raisins (a special ingredient by Andrias- he says it provides food to the yeast!) (This is the point when I harvested and added ripe fresh saguaro fruit, but it can be added at the beginning, too.)

Red saguaro fruit has been added to the bubbling brew.

5. Continue stirring multiple times per day. On Day 5 or 6, add another palmful of raisins, and again at Day 8-9. 

6. At about Day 10-12, the bubbles will begin to reduce in number and fervor. The yeast quickly consume and ferment most of the natural glucose in the honey, producing the alcohol and delicious brew. (The natural fructose takes longer to ferment and only does so if you age your mead for weeks and months.)

Frothy bubbles of active yeast activity!

7. Taste the mead. If it is too sweet for your liking, you can continue to stir and ferment a bit longer to “dry it out”. If you prefer more sweetness, Andras suggests you can “back sweeten” (add a bit of honey) to taste if desired, ideally a day prior to drinking it. 

8. Strain out any fruit, and serve at room temperature or chilled. Try both! The typical serving vessel for t’ej is a narrow-necked bottle called a berele.

The best way to enjoy your homemade honey wine is with friends, of course. I bet that you’ll pique curiosities about your brewing methods and newfound skill, and bring smiles to everyone’s face. Andrias thoughtfully shared that “you can tell from the smile that the food or drink is good”.

Honey Wine with Saguaro Fruit, Summer Solstice 2025

In Appreciation: 

Thank you to my teachers, including the bahidaj (saguaros), for their ongoing generosity and cultivation of our minds and hearts. 

Thanks to my new friends Andrias and incredible hosts Tilahun and his wife Kidist who are sharing their culture from Ethiopia with all of us in Tucson, Arizona.

Thanks to my mother Judith for kindly copy editing.

**To remove chlorine from the water simply draw the necessary amount of water and leave it out overnight. The chlorine will naturally evaporate from the open vessel. 


Bibliography

Belay, T. B. (n.d.). Call for access and benefit sharing of Rhamnus prinoides (Gesho). Ethiopian Biodiversity Institute, Genetic Resource Access and Benefit Sharing Directorate.

Jeremy C. Hollmann (2015): Bees, honey and brood: southern African hunter-gatherer rock paintings of bees and bees’ nests, uKhahlamba- Drakensberg, KwaZulu-Natal, South Africa, Azania: Archaeological Research in Africa, DOI: 10.1080/0067270X.2015.1079378

Katz, S. E., The Art of Fermentation: An In-depth Exploration of Essential Concepts and Processes from Around the World. Chelsea Green Publishing, 2012.

Little Backyard Eggs

Hi friends, Amy here. Years ago, chickens free ranged my entire backyard and roosted in the trees. However, my current neighborhood has red tailed hawks and striped skunks so I knew any domesticated birds here would need a fortress. Instead of making an enormous chicken enclosure, I opted to try smaller birds that wouldn’t feel so cramped in an aviary. Coturnix quail, Eurasian domesticated birds, are often raised for eggs and meat in tiny cages like rabbit hutches. So in my 100 square foot and six foot tall enclosure, a dozen of them scurry under plants, bathe in the dust and fly as well as they can. Also, since the rooster’s crow is not very loud, they don’t bother sleeping human neighbors. City dwelling roosters!

I started in late winter/early spring with two week old chicks raised locally. When the days grew long enough (almost 14 hours) at 11 weeks old, they stated laying.

Just like with free range chickens, every day is an egg hunt.

The shells are brittle but the membrane below is very tough. Quail egg scissors help make a clean break and keep frustrating fragments out of the dish.

About 4 quail eggs equal a large chicken egg.

They taste the same but definitely have more yolk to white than a chicken egg. Sometimes I enjoy the raw yolks with homemade kimchi and rice.

Hard boiling only takes 4 minutes!

That tough membrane under the shell makes them easy to peel.

These deviled eggs are topped with rosemary leaves and chuparosa (Justicia californica) flowers. I don’t bother to make mayonnaise, I just mix the yolks with olive oil, Dijon mustard, and salty preserved lemon.

Raising these birds was a long time coming for me. Here’s hoping some of your dreams come true!

It All Began Back in the 70s

I’ve been writing about natural food (wild and homemade) for about 50 years. In the 1970s  I was part of a groundswell of young people hoping to create a better society. We fled the big cities for rural communes, and we formed communities of cooperation and back-to-the land values. It wasn’t easy and we made lots of mistakes. 

They called us hippies. We learned to grow gardens

We learned to bake bread

We protested the Vietnam War

And of course  there was always sex, drugs and rock n’ roll.

My new novel Everything We Thought We Knew is set in Bella Vida, a 1970s commune. It’s fiction but in many ways it’s my story and the story of thousands who tried to fashion a better better society. Join the residents of Bella Vida to be transported into the grit, dreams, and heartbreak of the era. Like most communes, Bella Vida eventually disbands.  But that was not the end of the story for its residents. Thirty years later a child born there, now an adult, forces long-held secrets to be revealed and changes everyone’s life forever. 

Reviews:

Her characters are delightfully dimensional, and her creative twists of plot keep the reader riveted. A delight!  — C. Laughton

In Everything We Thought We Knew, Niethammer immerses us in the back to the land movement of the early 1970’s to explore what constitutes a good life. Is it the untested visions of idealistic youth or the compromises that inevitably define middle age? –Margaret Grunstein

Christie arrives with a sincere desire to change her life and maybe change the world, but she also carries a self-righteous certainty about how things are supposed to be which is quickly derailed in this commune. She is rescued by her curiosity, adaptability, and open mind. – Ann Evans

A rollicking romp through the 60s/70s and a woman’s heroic story, set in the foothills of Sky Island country in southeastern Arizona. With its wonderful characters and poignant surprise ending, this is Carolyn Niethammer’s beautiful, page-turner storytelling at its best. –Rick Brusca

Be transported back to 1970, protest the Vietnam War, frolic during invented holidays, and dance under the stars at an Indian ruin. You can find  Everything We Thought We Knew in paper and ebook direct from the publisher, Booklocker and at Amazon.com, Barnesandnoble.com, Walmart.com 

Lean Times for Desert Foods Foraging

My mentor and guide Juanita-baḍ warned us there will be times like this. Now awesome drought is upon us! She said if we need food from the desert, we must know famine-food-plants for the dry times. Tia Marta here to share some of her advice for desert harvesters in a drought.

When the beautiful Santa Rita prickly pear around town turns a wild purple or lavender, it’s vividly screeming “thirsty“–a visual pop-out in the dry landscape, as in this photo taken along the old Helmet Peak road south of Tucson. According to Watershed Management Group, the last 6 months have been the driest on record for Tucson, Arizona. We’re in the midst of the acid test for what’s to come.

In a well-watered garden this drought year, a prickly pear will be full of new-growth pads and flower buds. Find SavorSisterCarri’s ideas for making nopalitos with the young pads on her recent post.

April is known as Oam Maṣaḍ (Yellow Moon), but there won’t be many yellow prickly pear flowers this year out in the des, with no rain since October’s minimal drops. In this photo at Feliz Paseos Park, prickly pears are sadly damaged with drought. Over my 50 years of harvesting ciolim (cholla cactus flower buds), I’ve never known them to be “on hold” as they are this spring (2025), saving their resources for a better-bet year. Juanita-baḍ said there are always a few, but ciolim may now be telling us of a new phase….

According to Juanita-baḍ, we should know where to look for onk i:wagĭ (Wright’s saltbush Atriplex wrightii pictured above) in poor, salty soils. (The O’odham name is also used for A. polycarpa & A.elegans). It grows as an annual and can provide satisfactory “greens” over the warm and hot seasons when nothing else is available.

There are several “salt bushes” in the Sonoran Desert. Don’t be fooled by 2 different types of “seedheads” especially on our perennial four-wing saltbush (Atriplex canescens)! It is dioecious. Pictured here is the dried male flower. The (female) seed has “wings.” Foliage on both sexes is high in calcium, iron and potassium, high in salt, good for animals, but there isn’t a record of Indigenous people using it for food.

A perennial cousin of Onk I:wagĭ is Oedam or quailbush (Atriplex lentiformis) whose edible seeds are harvestable even in dry years. Many different Southwest Indigenous peoples have used its nutritious seeds to roast for flour and bread. Quailbush is a good landscape addition as a water-hardy hedge screen and bird habitat, as well as emergency food. See Food Plants of the Sonoran Desert by Wendy Hodgson, UA Press, 2001.

I tried stir-frying Oedam foliage with I’itoi’s onions, London rocket weed, carrots & celery, but –alert–I don’t recommend this! Tasty at first, the very salty greens became tough and bitter. I’ll stick to eating its seeds–and using its foliage in a dye bath.

Advice from Juanita-baḍ about barrel cactus was to wait patiently to harvest their fruit until you have nothing left to eat–that is, let it stay on the plant all winter until you have used up all your other stored food. As a yellow crown atop the barrel, its fruit is right there waiting when you need–unless a hungry roundtail ground squirrel beats you to it. She knew their tangy vitamins and crunchy protein would be a nutritional lift for famine times.

One of the few reliable desert spring foods–and one of her favorites, drought or not–is the sweet heart of a’ut from several species of Agave in the Sonoran Desert. Come celebrate this important, nutritious food at Tucson’s Agave Heritage Festival happening right now (April 10-13, 2025) all over town, with special events at Mission Garden! Hope to see you there!

At Mission Garden’s gift shop and at the Coyote Kitchen & Gift Shop at San Xavier Plaza, you can find Tia Marta’s Southwest Native Foods artwork and notecards, including this image of sacred Waw Giwulk (Baboquivari Peak) and its resident Agaves!

For more good info on stress-time foods, check out SavorSisterCarolyn’s post from an earlier year in this unprecedented drought, and find the book Famine Foods: Plants we Eat to Survive by Paul Minnis, UArizona Press, 2021, which she reviews so timely. It will be a good reference to use as these conditions become the “new normal.”